Vue3 Vite 入门笔记 2024 home 编辑时间 2024/07/09  ## 前言 我在笔记里搜了一下我都吓一跳,我已经入门了N次Vue了 真的是更新一次,就相当于重新入门一次 加上 WebPack Vite Vuex Pinia VueRouter Axios 以及数不清的第三方UI库,对我来说都是从0在学 希望尤总别再更新了,真的学不动了 现在确实不得不承认,JS JQuery + Bootstrap的时代还是过去了 打开速度 开发难度 用户体验,确实是用Vue更香 好在总的来说 Vue3 + Vite 确实不难 你要是像我这样不遵守设计规范夏姬八写,那就更轻松了 ## 折腾 参考官网 https://cn.vuejs.org/guide/introduction.html #### 准备工作 用Nvm安装Node20 Windows系统的Nvm下载地址 https://github.com/coreybutler/nvm-windows/releases 安装完成后,进cmd或者powershell 用 `nvm -h` 命令 可以看到如下内容,说明你安装成功了。 ```shell PS C:\WINDOWS\system32> nvm -h Running version 1.1.11. Usage: nvm arch : Show if node is running in 32 or 64 bit mode. nvm current : Display active version. nvm debug : Check the NVM4W process for known problems (troubleshooter). nvm install <version> [arch] : The version can be a specific version, "latest" for the latest current version, or "lts" for the most recent LTS version. Optionally specify whether to install the 32 or 64 bit version (defaults to system arch). Set [arch] to "all" to install 32 AND 64 bit versions. Add --insecure to the end of this command to bypass SSL validation of the remote download server. nvm list [available] : List the node.js installations. Type "available" at the end to see what can be installed. Aliased as ls. nvm on : Enable node.js version management. nvm off : Disable node.js version management. nvm proxy [url] : Set a proxy to use for downloads. Leave [url] blank to see the current proxy. Set [url] to "none" to remove the proxy. nvm node_mirror [url] : Set the node mirror. Defaults to https://nodejs.org/dist/. Leave [url] blank to use default url. nvm npm_mirror [url] : Set the npm mirror. Defaults to https://github.com/npm/cli/archive/. Leave [url] blank to default url. nvm uninstall <version> : The version must be a specific version. nvm use [version] [arch] : Switch to use the specified version. Optionally use "latest", "lts", or "newest". "newest" is the latest installed version. Optionally specify 32/64bit architecture. nvm use <arch> will continue using the selected version, but switch to 32/64 bit mode. nvm root [path] : Set the directory where nvm should store different versions of node.js. If <path> is not set, the current root will be displayed. nvm [--]version : Displays the current running version of nvm for Windows. Aliased as v. ``` 然后用 `nvm install 20` 安装node v20 过程略过 安装成功 用 `node -v` `npm -v` 看到如下画面 说明安装成功 ```shell PS C:\WINDOWS\system32> node -v v20.15.0 PS C:\WINDOWS\system32> npm -v 10.7.0 PS C:\WINDOWS\system32> ``` 关于npm慢的问题 现在还有这些选择 npx cnpm pnpm yarn 不要问我是什么意思我也不知道 我大部分情况下都是死磕npm 慢就等 失败就重来 #### 进入正题 直接上命令 ```shell # 先cd 到项目目录 cd C:\Users\Administrator\WebstormProjects # 启动自动化创建命令 npm create vue@latest ``` 根据自己需求选择即可 我这里只需要vue3 VueRouter pinia 其余全部选否 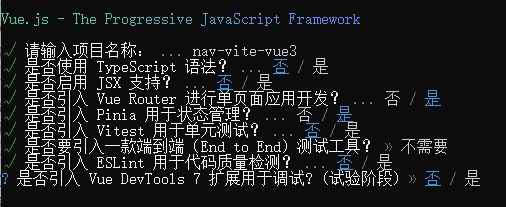 由于我不会用vscode 我这里选择用webstorm2024打开项目 删掉我个人感觉没啥用的文件 文件夹 最终目录如下 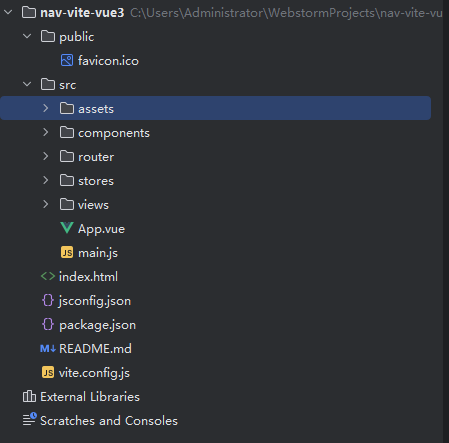 右下角 点击 npm install 初始化依赖 (或者右击package.json也可以选择npm install) 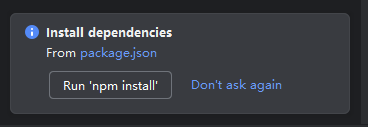 右击package.json 选择 Show npm Scripts 就可以不用打命令了,可以图形化启动项目或打包项目  这里可以双击dev试下效果 点击这个链接就可以开始调试了 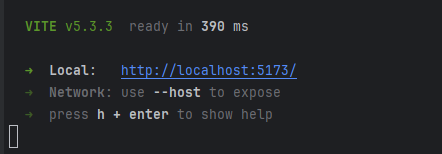 看到这个界面说明启动成功了 并且项目里已经附带了pinia (替代vuex) 和 vue router 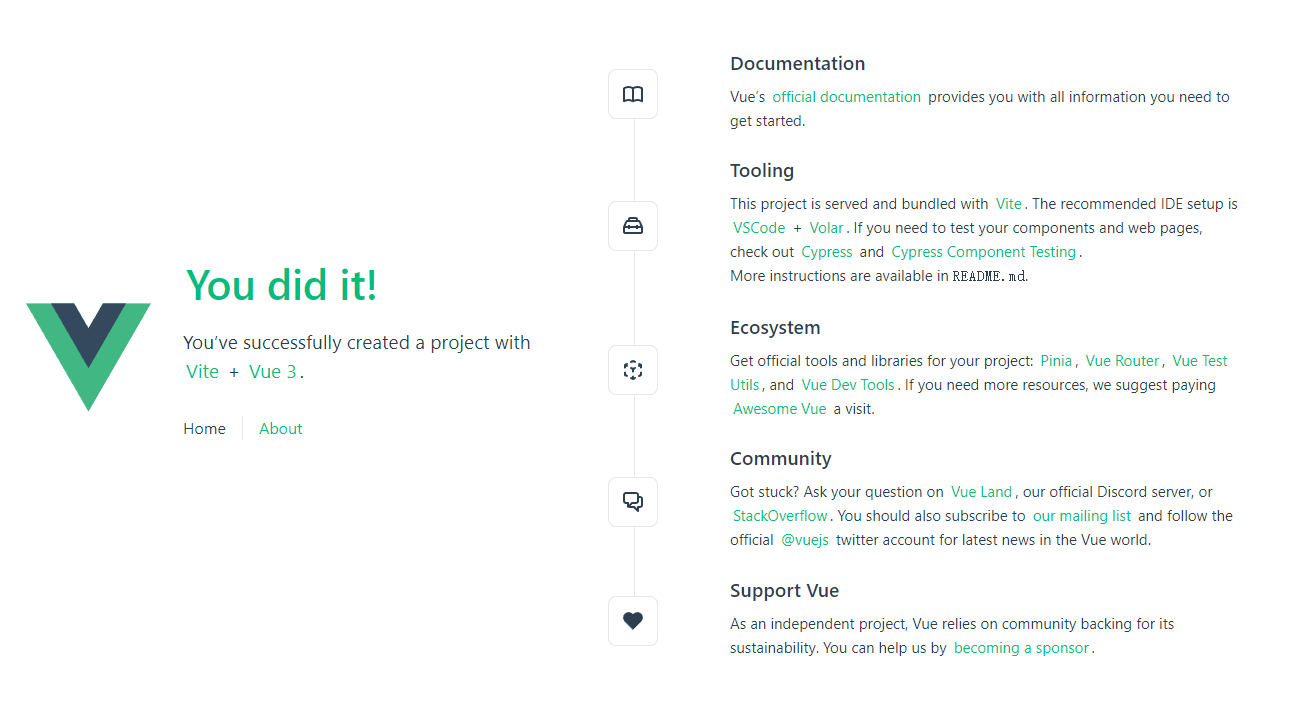 #### 其他依赖 这里再推荐装几个必装的依赖 开发环境里添加 sass terser 生产环境里添加 axios (WebStorm快捷键是Alt F12进入控制台输命令) ```shell # 安装命令 npm install sass --save-dev npm install terser --save-dev npm install axios --save ``` router和pinia的配置文件已经自动生成过了 这里把新添加的3个配置一下 新建 `axios/index.js` 处理HTTP请求 ```javascript import axios from 'axios' // 接口前半部分不变的部分 改成你自己的 axios.defaults.baseURL = 'http://xxxx:9999/xxx/'; //设置请求头 axios.defaults.headers.post["Content-Type"] = "application/json"; axios.defaults.headers.get["Content-Type"] = "application/json"; //设置超时 axios.defaults.timeout = 30000; //请求拦截器 axios.interceptors.request.use( config => { // const token = store.state.token; // token && (config.headers.Authorization = token); return config; }, error => { return Promise.reject(error); } ); //响应拦截器 axios.interceptors.response.use( response => { if (response.status == 200) { return Promise.resolve(response); } else { return Promise.reject(response); } }, error => { alert(`异常请求:${JSON.stringify(error.message)}`) } ); //封装post/get请求 export default { post(url, data) { return new Promise((resolve, reject) => { axios({ method: 'post', url, data, //data: qs.stringify(data), //参数序列化 }) .then(res => { resolve(res.data) }) .catch(err => { reject(err) }); }) }, get(url, data) { return new Promise((resolve, reject) => { axios({ method: 'get', url, params: data, }) .then(res => { resolve(res.data) }) .catch(err => { reject(err) }) }) } }; ``` 补上用法例子 ```vue <script setup> import axios from '../axios'; // 同步用法 推荐用同步 因为异步你要考虑太多问题 const init = async () => { // 加载中特效 const result = await axios.post('xxx/xxx', {'param': param}).catch(error => { // 这里的错误是JS报错 console.error(error) }); // 这里是后端返回的 console.log(result); } </script> ``` terser 是打包压缩工具 在 `vite.config.js` 中加这段 效果是打包的时候按这个规则压缩代码 ```shell export default defineConfig({ build: { // 使用 Terser 进行压缩,并传递 Terser 的配置项 minify: 'terser', // 可以在这里添加更多的 Terser 配置项 terserOptions: { compress: { // 优化 if-return 和 switch-case 的语句 passes: 3, drop_console: false, drop_debugger: false }, mangle: { // 保留顶层函数名 特定变量名 keep_classnames: false, keep_fnames: false, }, format: { // 注释 comments: false, }, }, target: 'es2015', rollupOptions: { output: { chunkFileNames: `js/[hash].js`, entryFileNames: `js/[hash].js`, assetFileNames: `[ext]/[hash].[ext]`, } } }, }) ``` sass 我不懂我只说下我怎么用的 首先他不用配置 装完依赖直接用 情况1 是一个scss文件 (我让kimi写了一下简单注释 说明一下和css的区别) `assets/css/styles.scss` ```scss // 定义一个变量 $primary-color,并赋值为颜色 #35495e $primary-color: #35495e; $secondary-color: #2c3e50; .btn { // 使用变量 $primary-color 设置文本颜色 color: $primary-color; background-color: $secondary-color; padding: 10px 20px; border: none; border-radius: 5px; cursor: pointer; // 使用 & 符号引用父选择器,即 .btn // 这允许你为 .btn 类添加伪类或媒体查询等 &:hover { // 使用内置的 lighten 函数将 $secondary-color 颜色变亮 10% // 这是 SASS 的一个特性,它允许你进行颜色操作 background-color: lighten($secondary-color, 10%); } } ``` 情况2 是Vue文件里写一段sass代码 (顺便在注释里简单说下vue3和2的区别) `views/Index.vue` ```vue <template> <!-- 在vue2中 template下只能有一个节点 在vue3中可以是多个 --> <div class="card"> </div> <div class="card"> </div> </template> <script setup> // 上面的setup是语法糖 参考 https://cn.vuejs.org/api/sfc-script-setup.html#script-setup // 下面这段是用到哪些方法就引入哪些依赖 import {ref, onMounted, watch} from 'vue'; // 这里的ref是关键 现在申明双向绑定的变量必须用ref括号套着申明 const config = ref({ id: "qrcode", href: "qrcode.css", }); // 这里就是单纯写一个方法 类似于以前method里的function const init = () => { const wx = new WxLogin(config.value) } // 这里是类似于以前的mounted首次渲染完成后执行方法 created创建完成执行方法 onMounted(() => { init(); }); // 这个就是以前的watch 针对某个值发生改变 触发方法 watch( () => config.value, (new, old) => { init(); }, { deep: true } ); </script> <style scoped lang="scss"> // 在这里可以直接写sass代码 打包时候回自动转换回css </style> ``` pinia我也不熟 不误人子弟的 贴个官网地址 官方demo 给你自己品 https://pinia.vuejs.org/ https://stackblitz.com/github/piniajs/example-vue-3-vite?file=README.md ## END 送人玫瑰,手留余香 赞赏 Wechat Pay Alipay GraalVM入门 Springboot3 项目 Docker 入门 SpringBoot 3 Spring Cache Redis 实现对接口自定义缓存