IDEA Community 社区版入门教程 可永久免费 home 编辑时间 2022/09/30  <br><br> ## 前言 最近 `IDEA Ultimate` 想要白嫖的难度越来越大 目前有这几个解决方案 1. 想要继续使用 "学习版" 就必须永远停留在2020版本 相对的JDK版本也就停留在 `Java 14` 无法再继续使用更新版本 2. 也可以选择购买正版,今年10月1日就开始涨价了,大约RMB1100+每年。 3. 参加IDEA官方活动,比如这个 [开源项目](https://www.jetbrains.com/zh-cn/community/opensource/#support) , 满足要求可以申请到一年的正版,门槛略高 4. 最后就要说到今天重点讲的方案,IDEA除了`Ultimate`完整版,还有一个`Community`社区版,社区版是可以永久免费使用的,但只保留最基础的功能,其余功能需要自己通过打补丁来折腾,好处是永久免费使用,且可以一直保持更新! <br><br> ## 折腾 首先是官网下载 [https://www.jetbrains.com/idea/download/](https://www.jetbrains.com/idea/download/) <br> 选择右边的Community版本,至于exe和zip看个人喜好,没什么区别 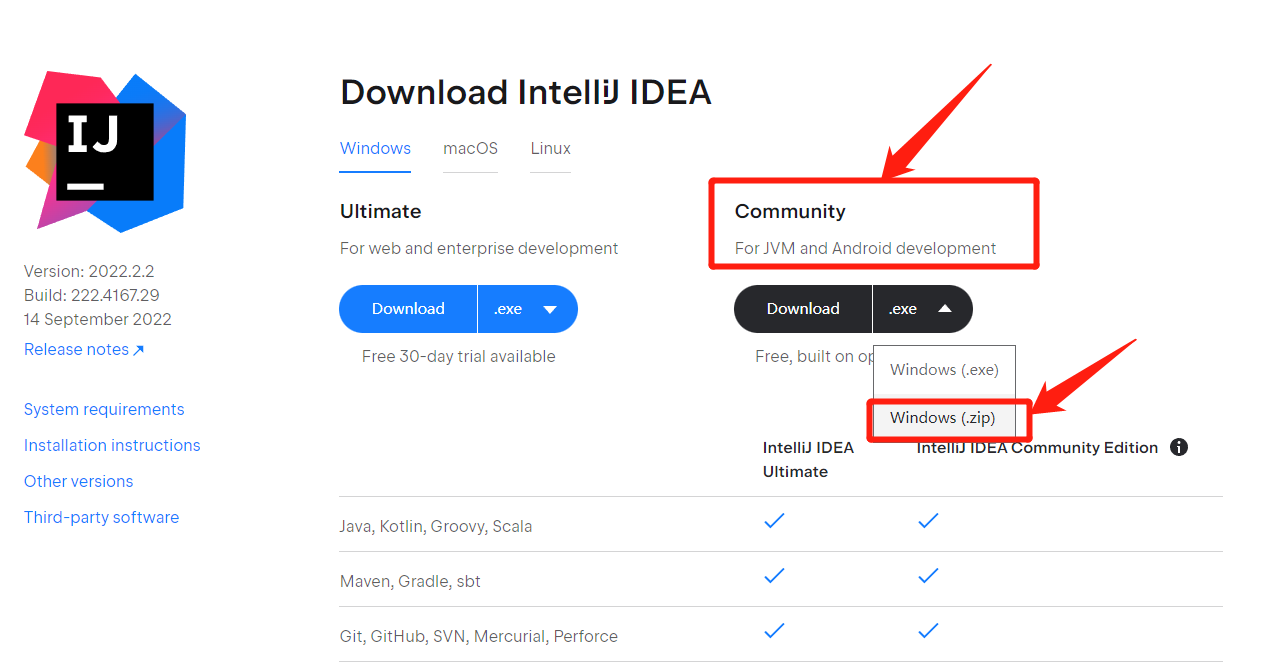 <br> 往下翻可以看到,社区版只支持最基本功能,其余只能靠插件自己折腾 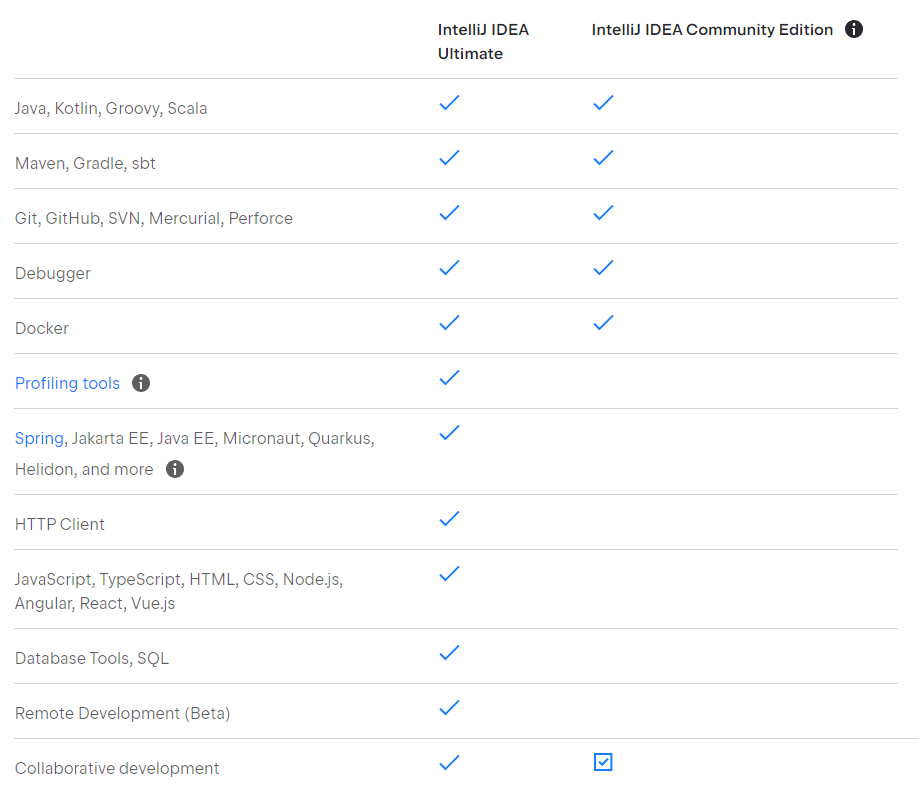 <br> exe版 安装完桌面执行快捷方式 zip版 解压后在目录:`~\ideaIC-2022.2.2.win\bin\idea64.exe` <br> 启动后直接开始装插件(裸连会有点慢,耐心等能刷出来,多试几次) 如果和我一样啃英文原版说明有难度的,可以去官网搜插件 [https://plugins.jetbrains.com/](https://plugins.jetbrains.com/) 就可以用浏览器的在线翻译理解插件功能和简单用法 <br> 亲测发现 `Spring Boot Helper` 是最接近的,可以新建项目,内部跳转,yml补全等,但这是收费插件,貌似是12美刀一年。就是为了白嫖才折腾半天,结果还要收费,放弃之 其次接近且免费的是 `Spring Assistant` ,但截止 `2022/09/30` ,还不支持最新版 `IDEA Community` 于是只能再退而求其次选择 `Spring Boot Assistant`,这个只缺新建项目,其余还可以。于是决定用这个插件来支持Springboot,缺失的新建项目功能用Springboot官网的新建项目代替即可 <br> `Spring Boot Assistant` 用于支持Springboot 内部跳转 yml补全等 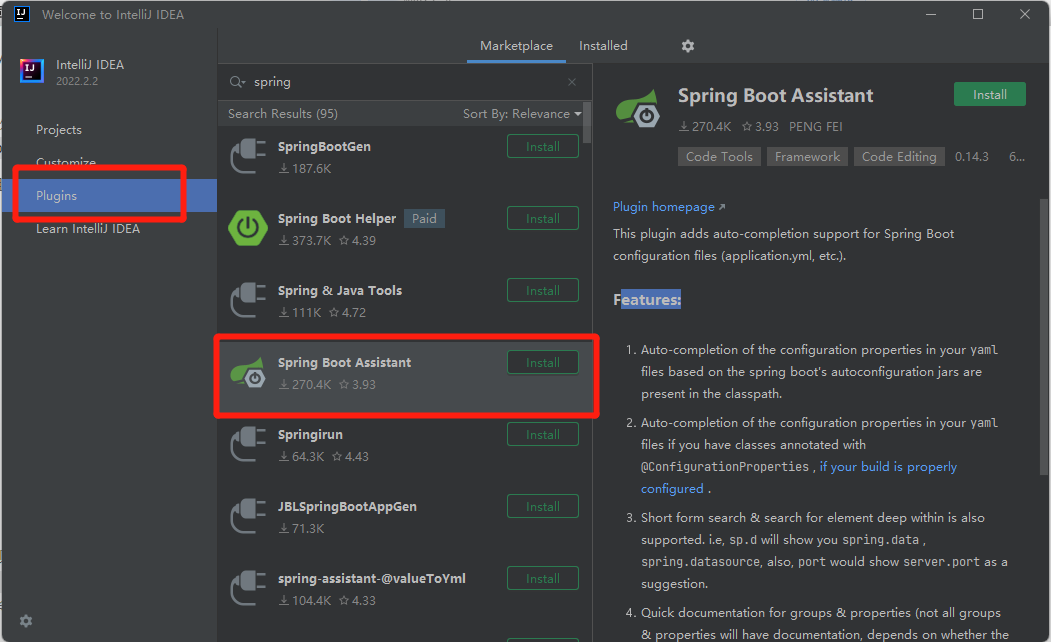 `MybatisX` 用于支持MybatisPlus开发补全跳转和自动生成service mapper xml等 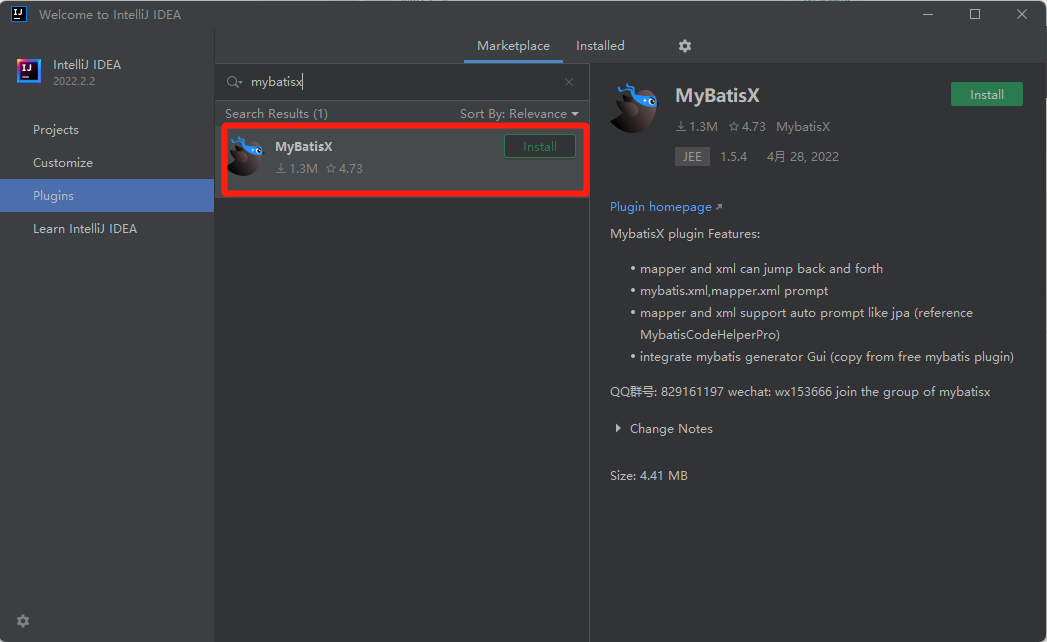 <br> `Monokai Pro Theme` 顺便推荐下配色,直接用这个主题一步到位 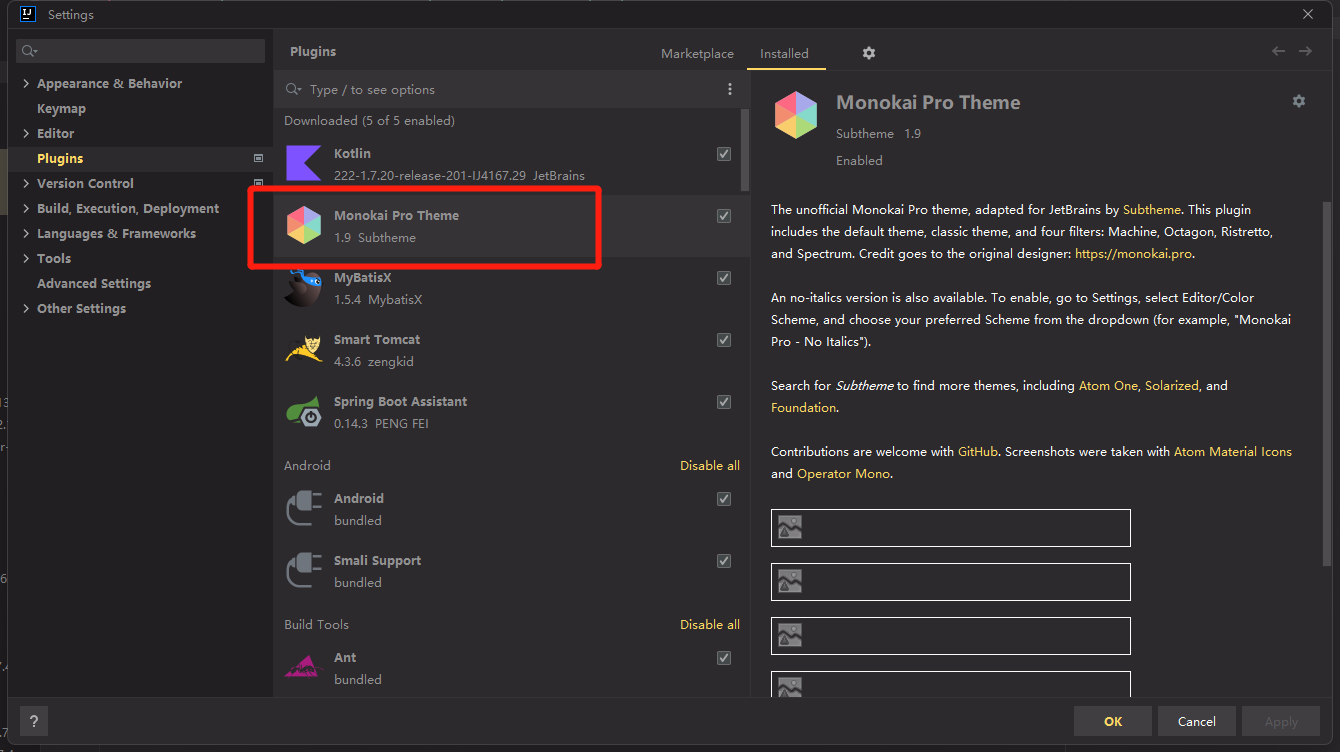 <br> 官方效果图 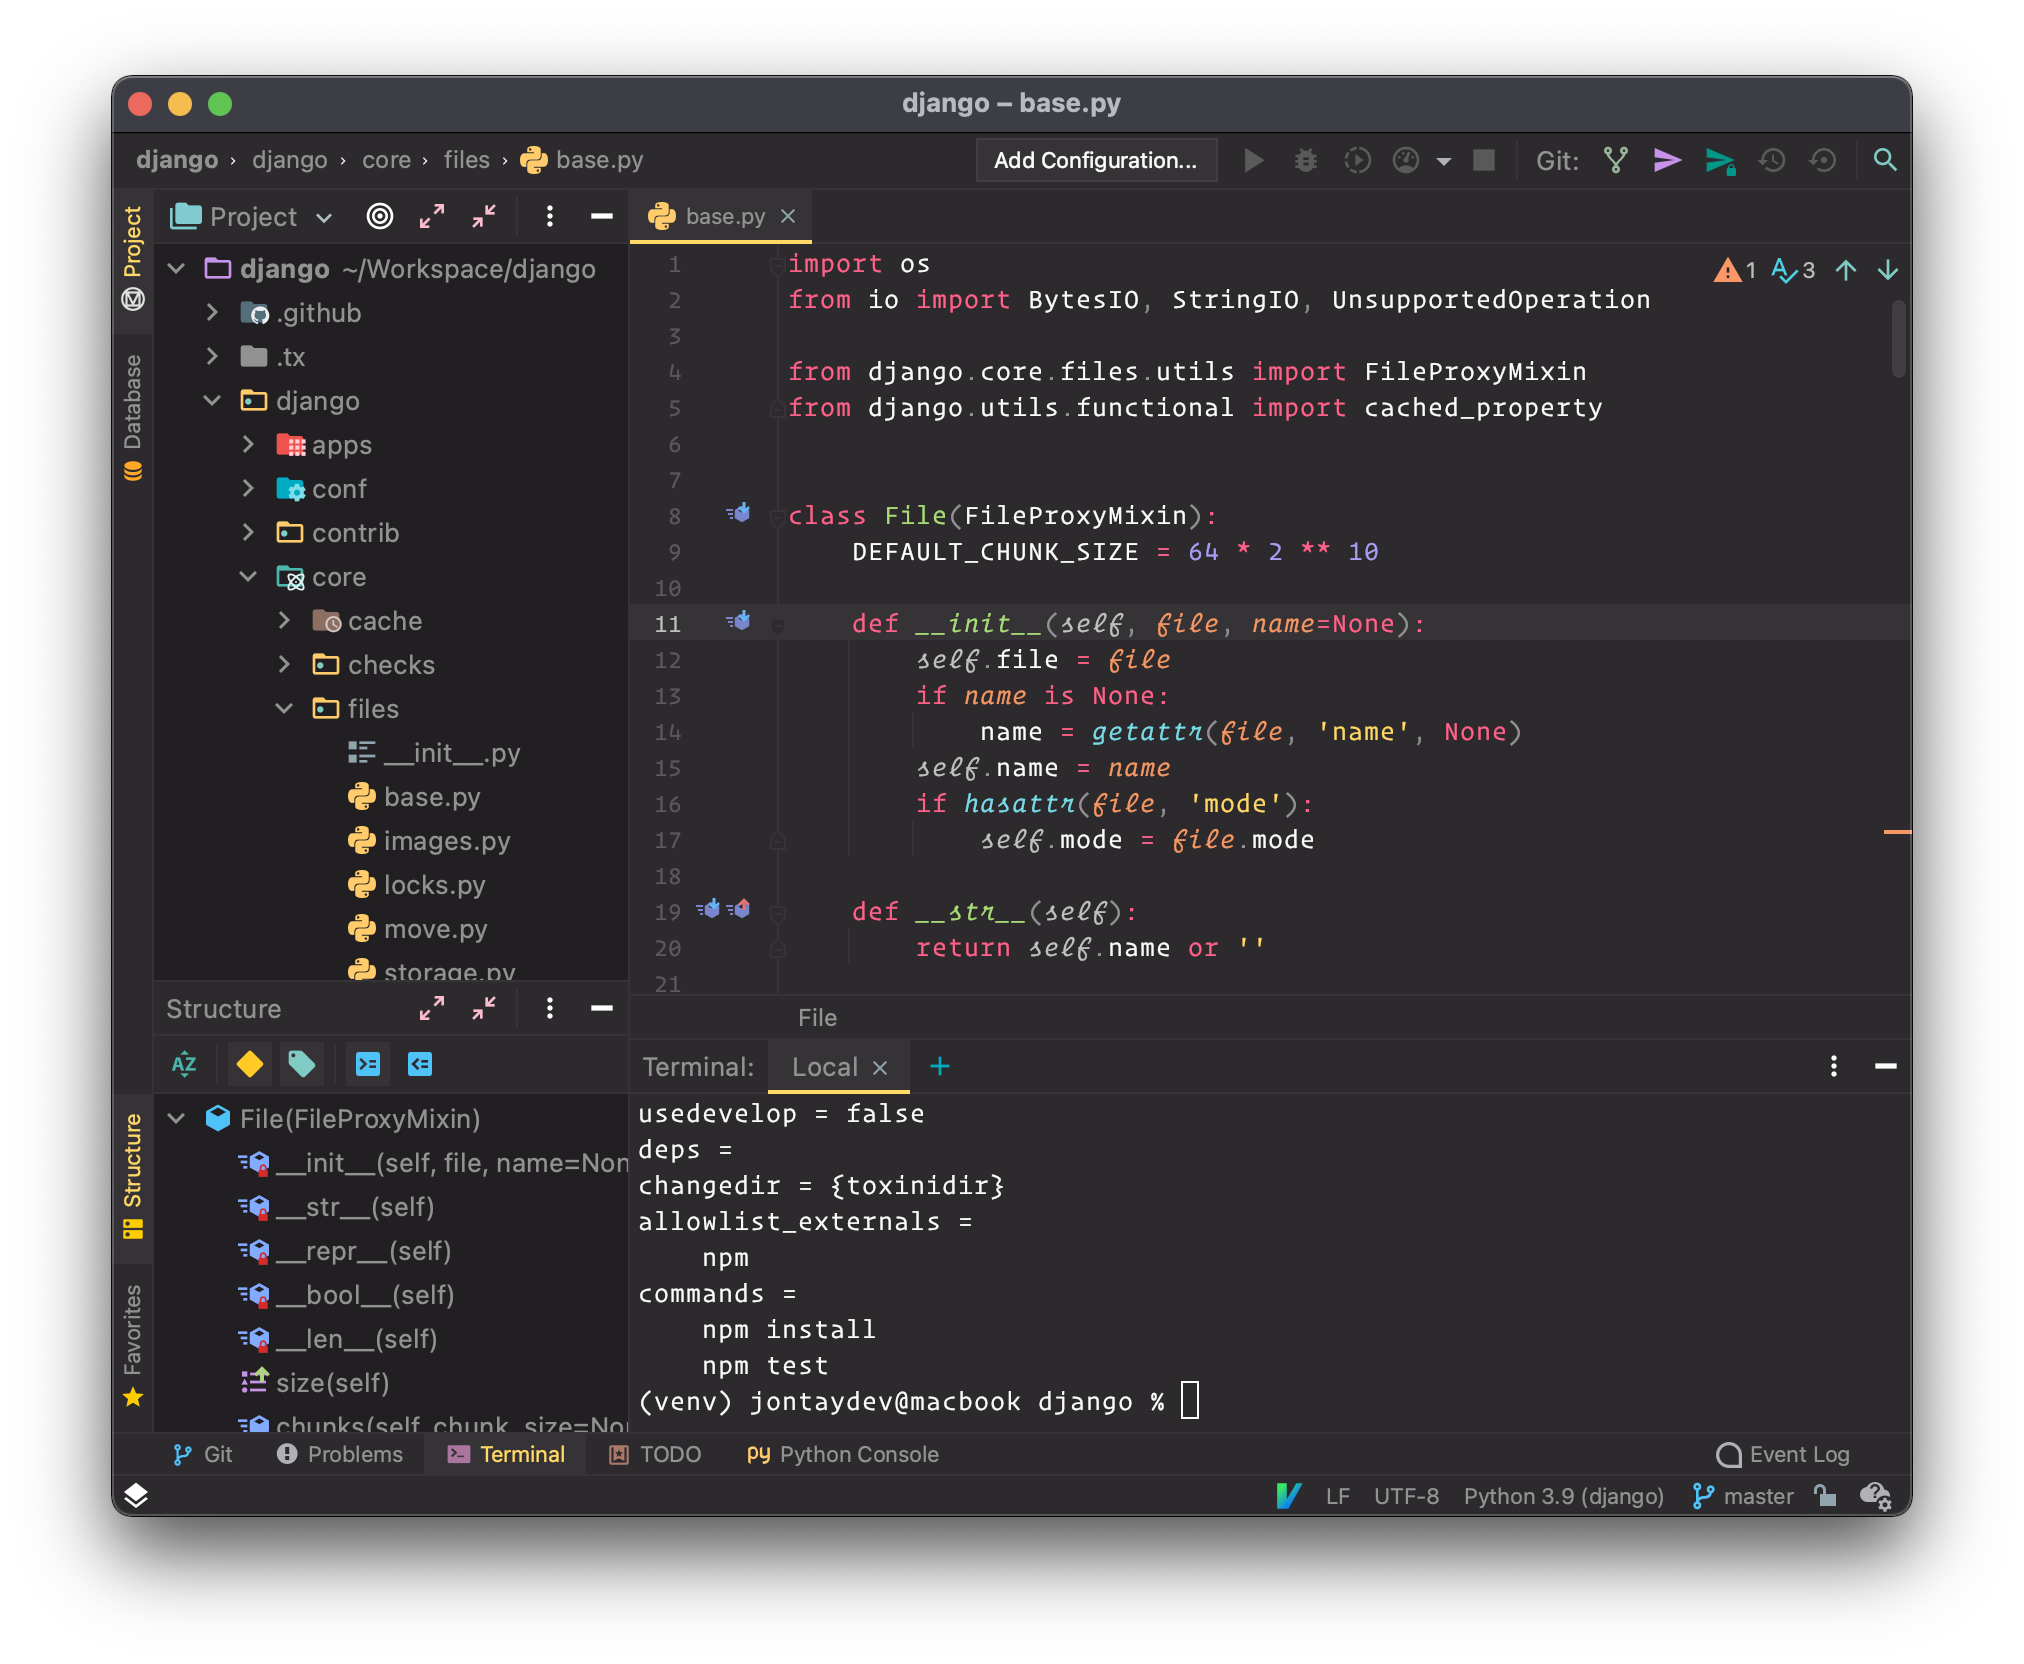 <br> 字体用默认的 `JetBrains Mono` 就很适合开发 <br> 可以再换个深色背景图 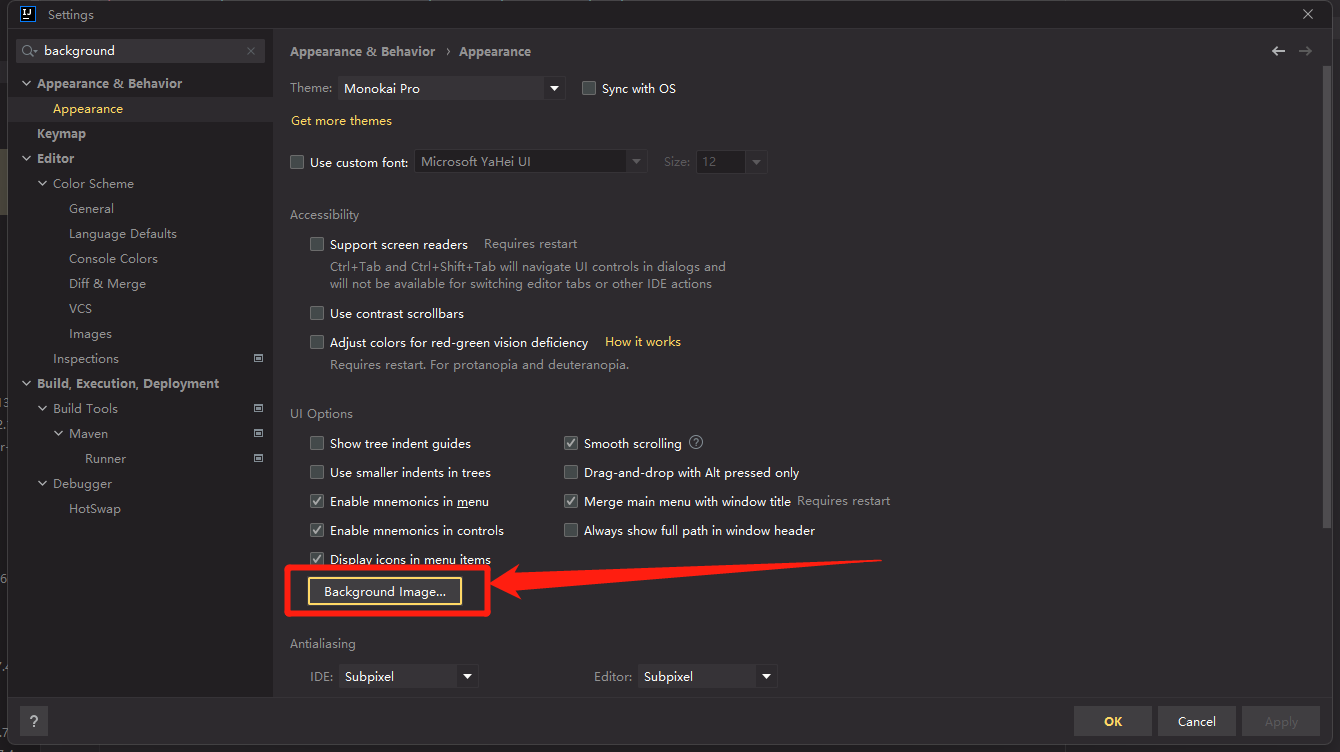 <br> 这里推荐用[极简壁纸](https://bz.zzzmh.cn)找图 换完效果如下 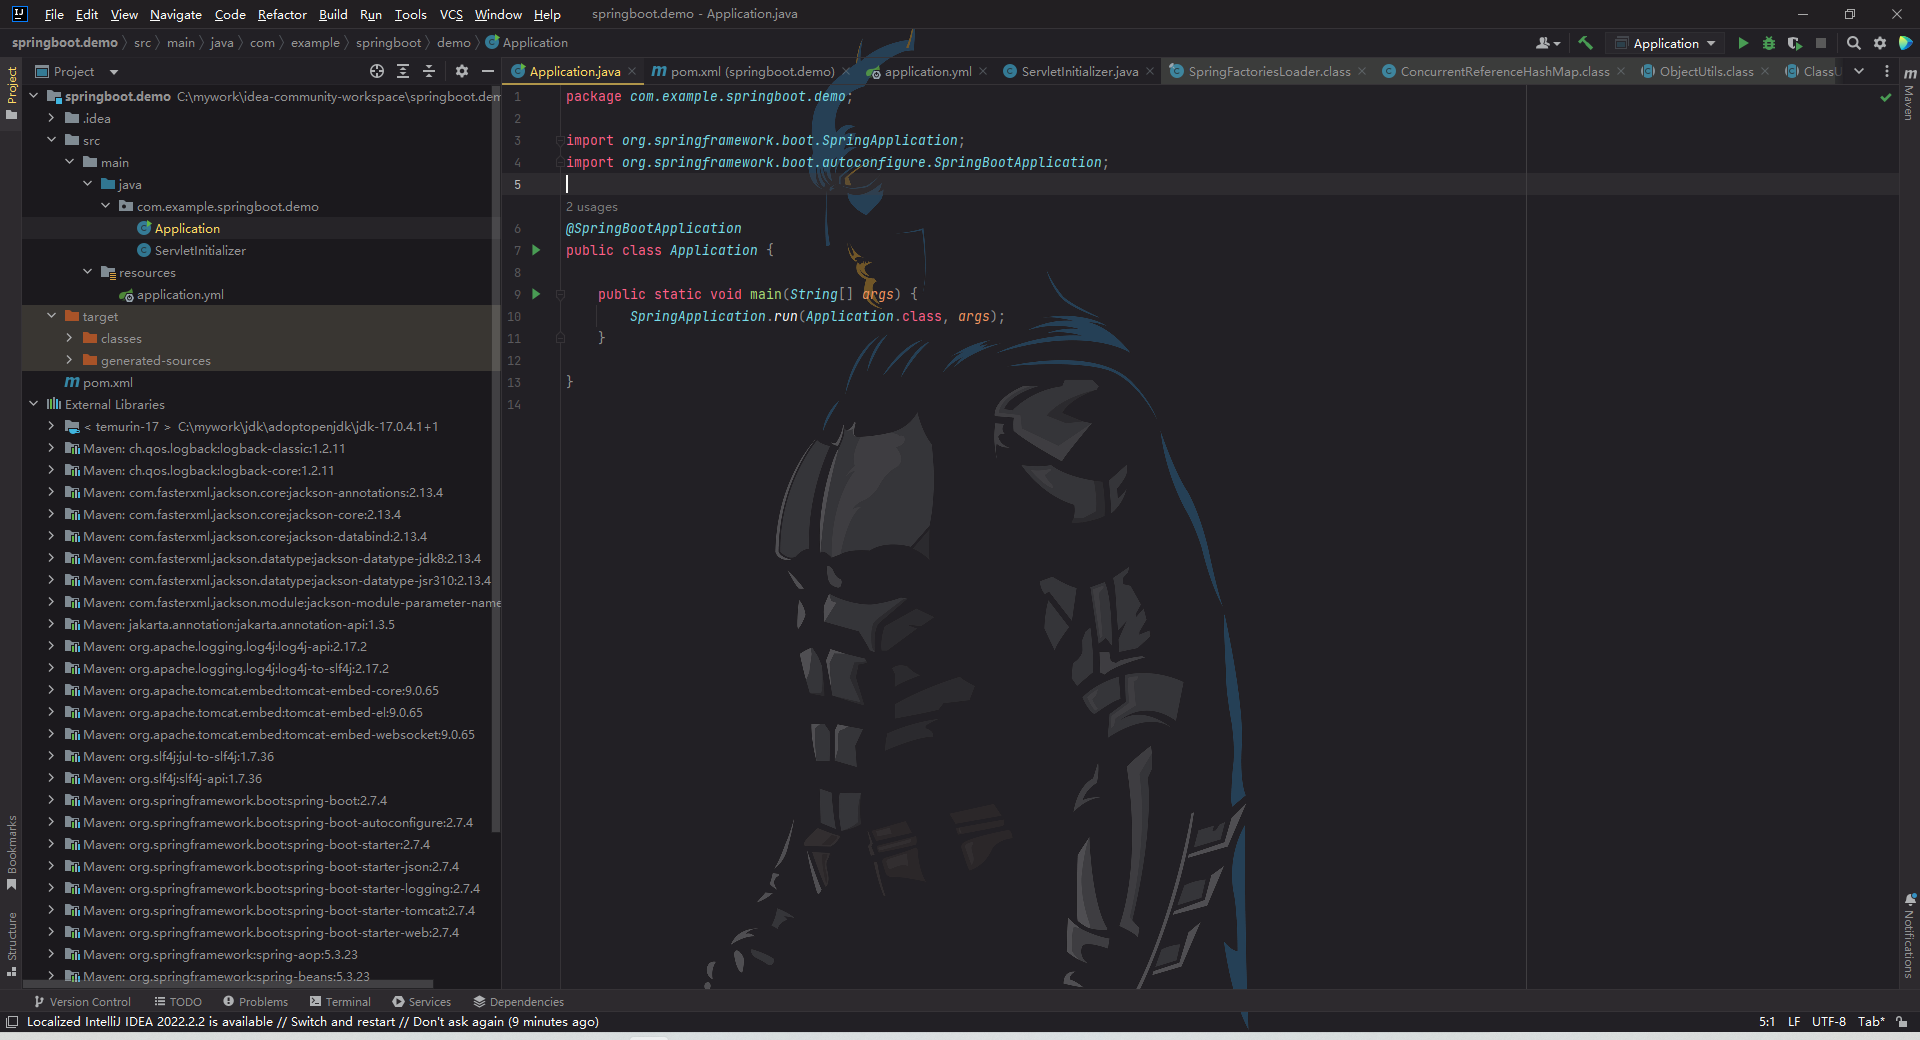 <br><br> 装完手动重启下ide 新建一个demo项目试试水 到官网新建项目 [https://start.spring.io/](https://start.spring.io/) 如图,选完以后点下面 `GENERATE` 创建项目 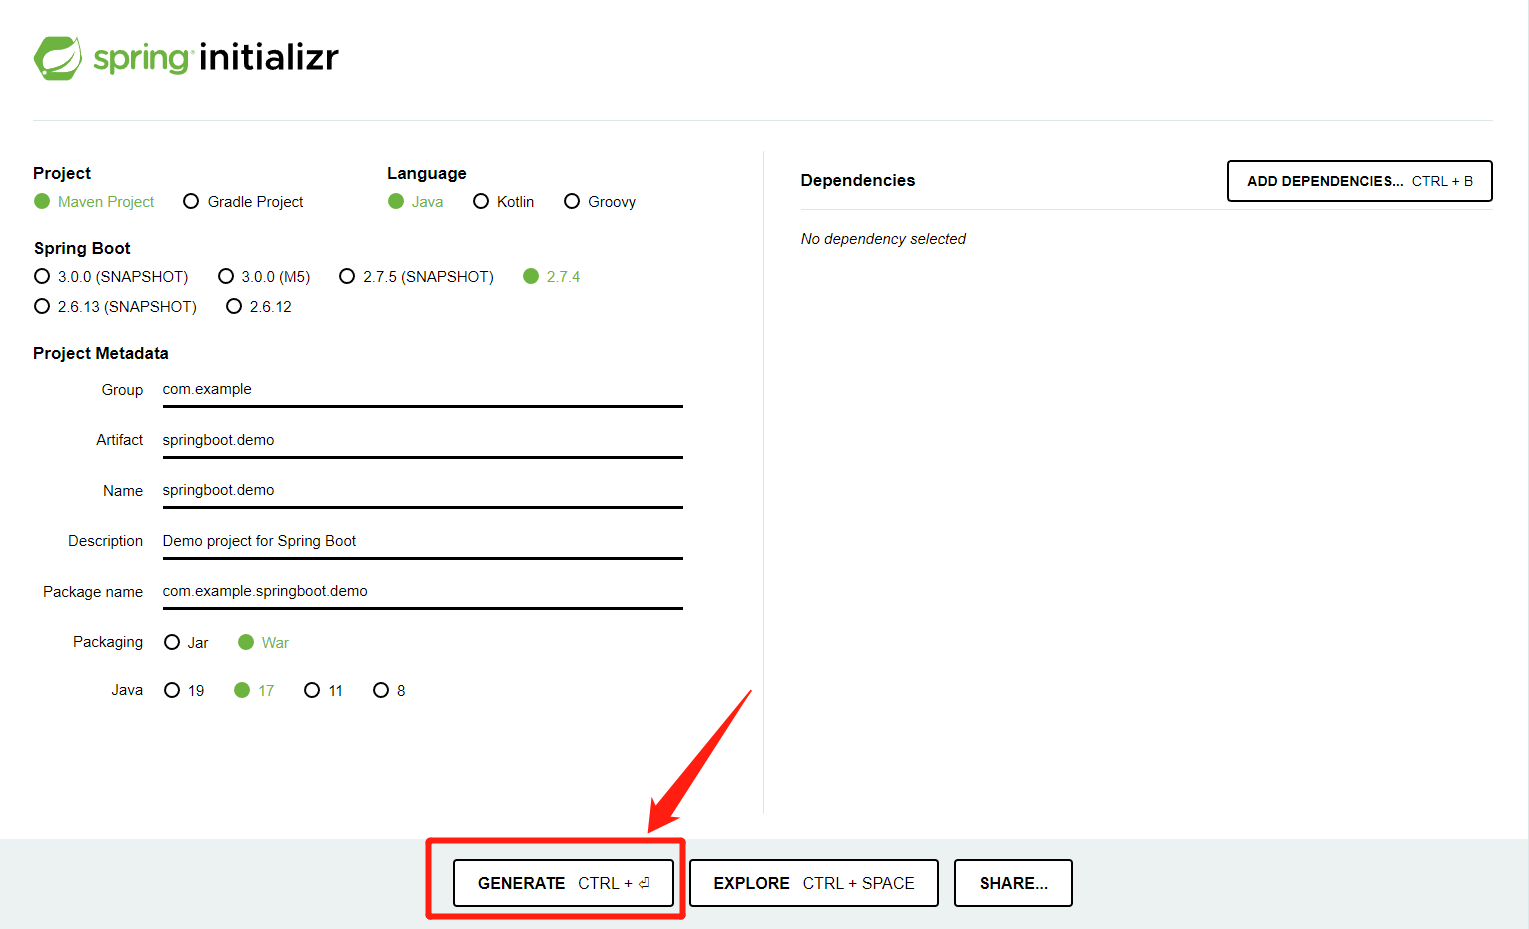 解压到开发目录,并用idea打开 `projects -> oepn` 打开项目后第一件事,先去设置里,把maven调整成本地maven,否则idea会自动下载一个完整maven,慢到爆炸 然后删掉一些无关紧要的文件(个人习惯) 最后去maven的pom.xml最后 修改成这段内容 替换原来的build ```xml <build> <finalName>${project.artifactId}</finalName> <plugins> <plugin> <groupId>org.springframework.boot</groupId> <artifactId>spring-boot-maven-plugin</artifactId> <configuration> <excludes> <exclude> <groupId>org.projectlombok</groupId> <artifactId>lombok</artifactId> </exclude> </excludes> </configuration> </plugin> </plugins> </build> ``` 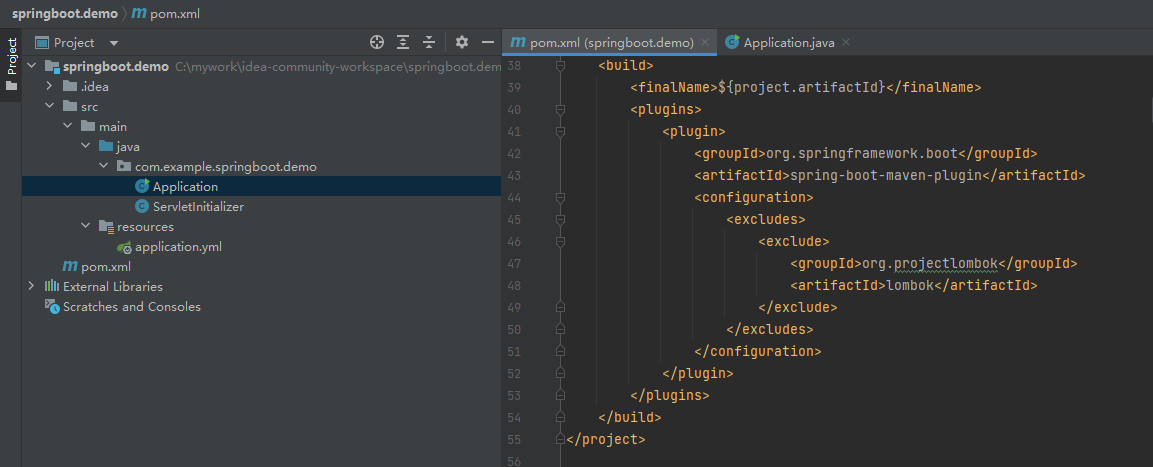 顺便去看下JDK,在菜单栏 File -> Project Structure 中,3个地方,都选择JDK17 全部搞完就可以刷新Maven了 如果网路好的话,理论上可以直接通过,如果网不好可以试试在pom.xml中再加一段阿里云镜像 ```xml <repositories> <repository> <id>central</id> <name>aliyun maven</name> <url>http://maven.aliyun.com/nexus/content/groups/public/</url> <layout>default</layout> <!-- 是否开启发布版构件下载 --> <releases> <enabled>true</enabled> </releases> <!-- 是否开启快照版构件下载 --> <snapshots> <enabled>false</enabled> </snapshots> </repository> </repositories> ``` <br> 这里遇到一个小坑 启动项目后只跑了3行程序就终止了 盲猜是springboot-web没启动起来 ```shell . ____ _ __ _ _ /\\ / ___'_ __ _ _(_)_ __ __ _ \ \ \ \ ( ( )\___ | '_ | '_| | '_ \/ _` | \ \ \ \ \\/ ___)| |_)| | | | | || (_| | ) ) ) ) ' |____| .__|_| |_|_| |_\__, | / / / / =========|_|==============|___/=/_/_/_/ :: Spring Boot :: (v2.7.4) 2022-09-30 11:15:14.411 INFO 2336 --- [ main] com.example.springboot.demo.Application : Starting Application using Java 17.0.4.1 on ROG-G14 with PID 2336 (C:\mywork\idea-community-workspace\springboot.demo\target\classes started by Administrator in C:\mywork\idea-community-workspace\springboot.demo) 2022-09-30 11:15:14.414 INFO 2336 --- [ main] com.example.springboot.demo.Application : No active profile set, falling back to 1 default profile: "default" 2022-09-30 11:15:15.051 INFO 2336 --- [ main] com.example.springboot.demo.Application : Started Application in 1.094 seconds (JVM running for 1.417) Process finished with exit code 0 ``` <br> 试了网上各种方法无果,后把maven中的这2个注销掉就好了 `pom.xml` ```xml <!-- <dependency>--> <!-- <groupId>org.springframework.boot</groupId>--> <!-- <artifactId>spring-boot-starter-tomcat</artifactId>--> <!-- <scope>provided</scope>--> <!-- </dependency>--> <!-- <dependency>--> <!-- <groupId>org.springframework.boot</groupId>--> <!-- <artifactId>spring-boot-starter-test</artifactId>--> <!-- <scope>test</scope>--> <!-- </dependency>--> ``` 后面的部分就没必要继续写了,和我之前一篇笔记一样了,直接参考 [从零新建一个 Springboot 2.7.1 项目搭配 Swagger 3.0 Knife4j MyBatisPlus 等](https://leanote.zzzmh.cn/blog/post/admin/62d618a2da740500130121d2) <br><br> 前文描述的是Java只负责写接口的情况下,可以完美实现95%的功能 另外还有一种情况是需要Tomcat、JSP、Html、JavasSript等支持 这个部分蛋疼的地方在于,有这个需求的人很少,JSP没几个人在用了 纯前端一般直接用 `VSCode` 又香又免费。 所以这部分的折腾只能尽量接近能用,很难支持到完美 亲测目前只能勉强做到可以启动和高亮和编辑,暂时无法自动补全 <br> `Smart Tomcat` 安装插件获得tomcat支持 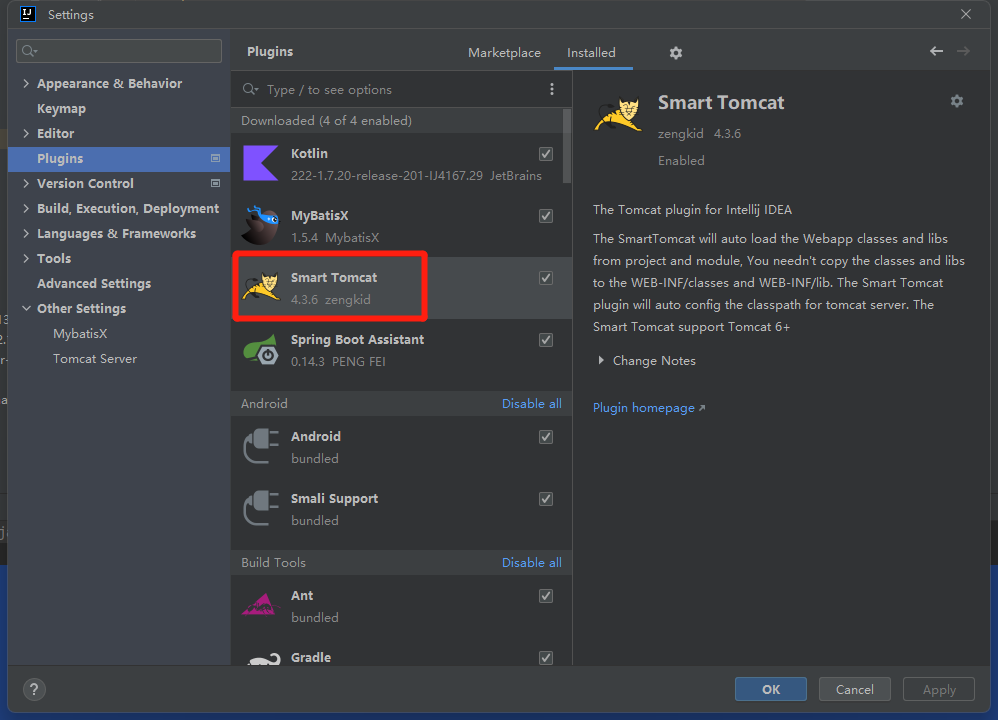 <br> 设置中搜索tomcat,并手动配置位置 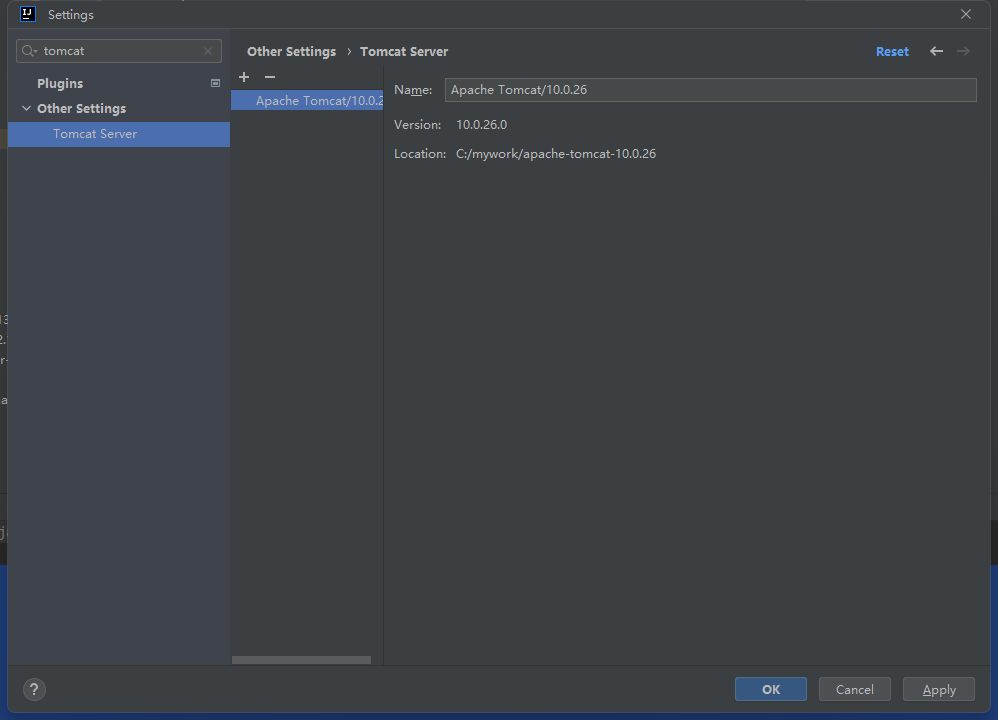 <br> 新建一个普通Java项目 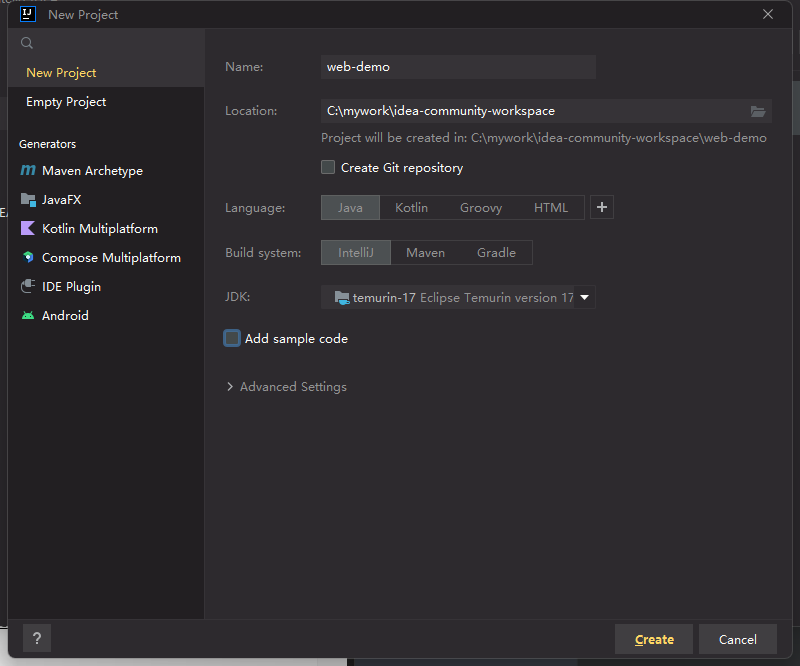 按以下目录新建文件夹 ``` web-demo │─── web │ │─── WEB-INF │ │ │─── lib │ │ │ └─── jstl-1.2.jar │ │ └─── web.xml │ └─── index.jsp ``` 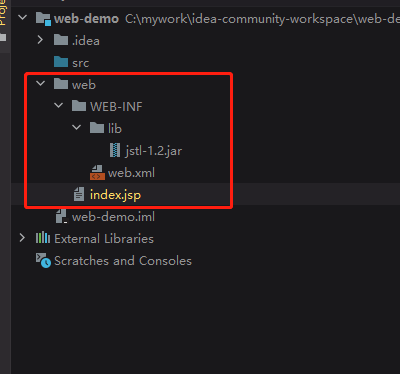 <br> 其中 `jstl-1.2.jar` 到maven下载 [https://mvnrepository.com/artifact/javax.servlet.jsp.jstl/jstl/1.2](https://mvnrepository.com/artifact/javax.servlet.jsp.jstl/jstl/1.2) `web.xml` ```xml <?xml version="1.0" encoding="UTF-8"?> <web-app xmlns="http://xmlns.jcp.org/xml/ns/javaee" xmlns:xsi="http://www.w3.org/2001/XMLSchema-instance" xsi:schemaLocation="http://xmlns.jcp.org/xml/ns/javaee http://xmlns.jcp.org/xml/ns/javaee/web-app_4_0.xsd" version="4.0"> <display-name>web-demo</display-name> <welcome-file-list> <welcome-file>index.jsp</welcome-file> <welcome-file>index.html</welcome-file> <welcome-file>index.htm</welcome-file> </welcome-file-list> </web-app> ``` `index.jsp` ```jsp <%@ page language="java" contentType="text/html; charset=UTF-8" pageEncoding="UTF-8" %> <!DOCTYPE html> <html lang="zh-CN"> <head> <meta charset="utf-8"> <meta http-equiv="X-UA-Compatible" content="IE=edge"> <meta name="viewport" content="width=device-width, initial-scale=1"> <title>web-demo</title> </head> <body> <% out.print("<h1>web demo!</h1>"); %> </body> </html> ``` <br> 添加依赖 先把项目web下的lib加入依赖 然后把tomcat下的lib加入依赖 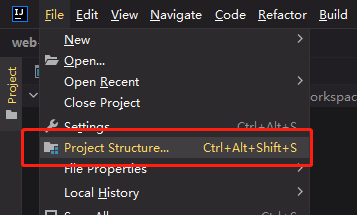 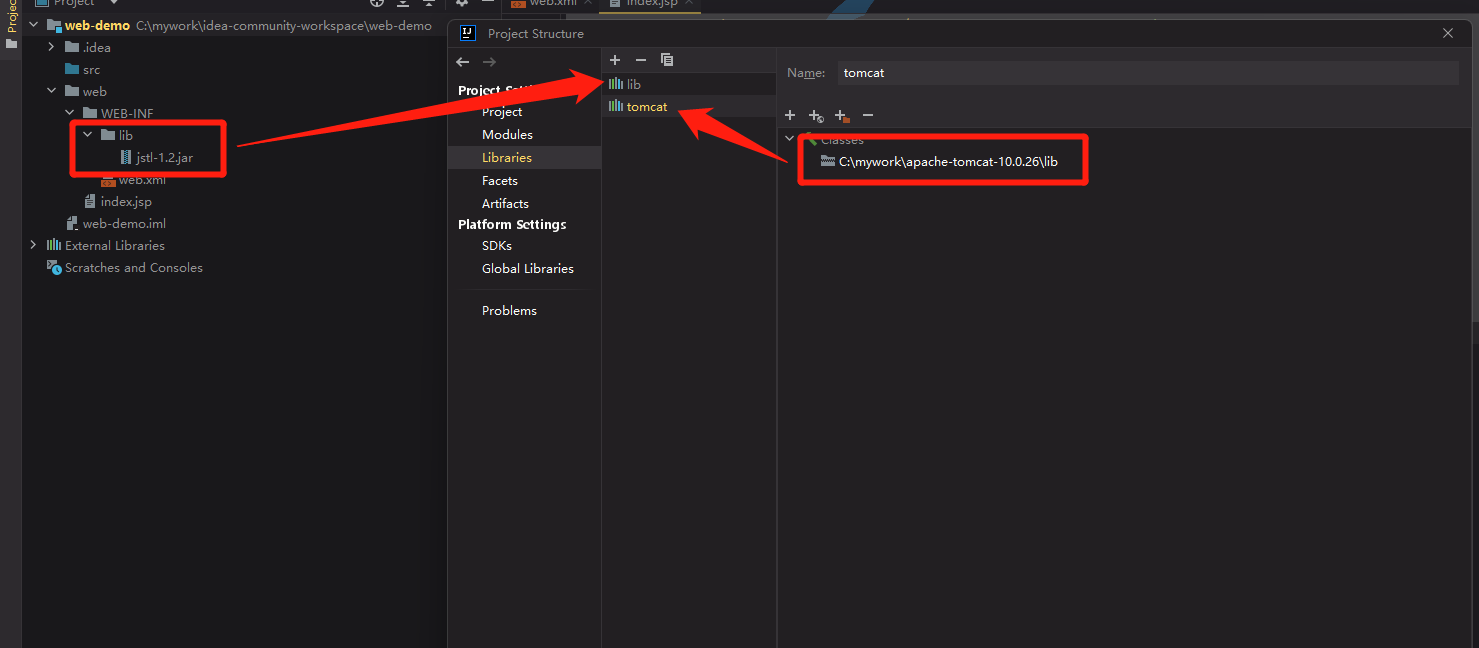 <br> 配置tomcat 新增一个容器选择tomcat,只需要配置 `Deployment Directory` 到项目下的web目录,其余默认 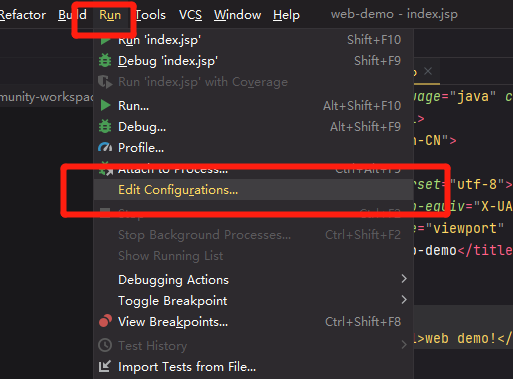 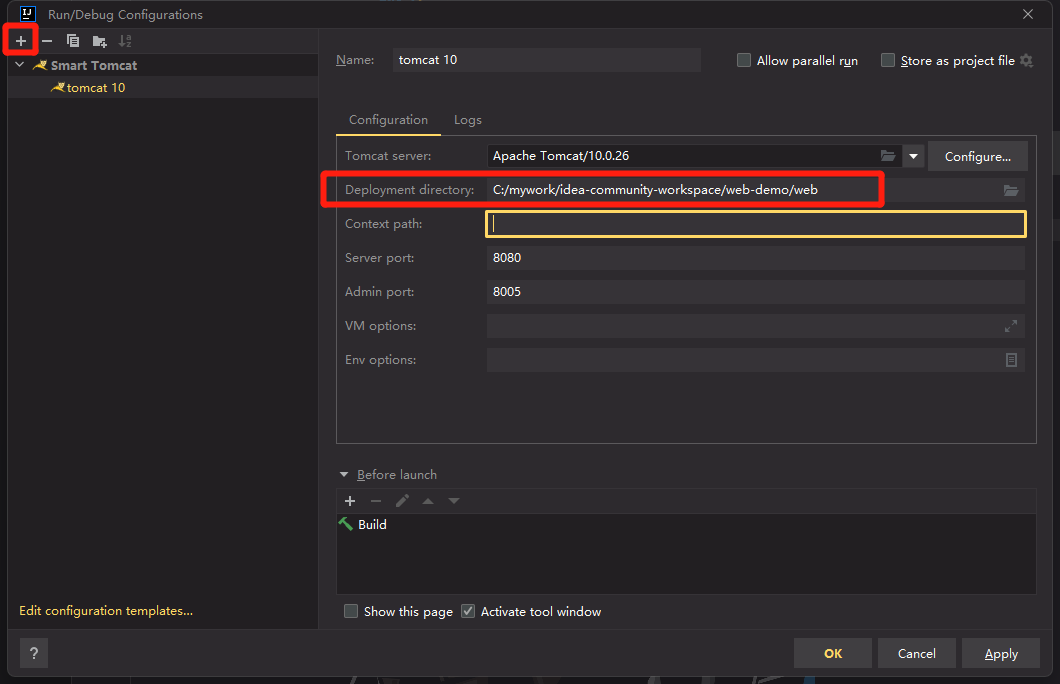 <br> 直接启动即可,点右上角绿色箭头启动,比较意外的是默认居然就修好了控制台中文乱码bug  <br> 访问 `http://localhost:8080` 一切正常 搞定 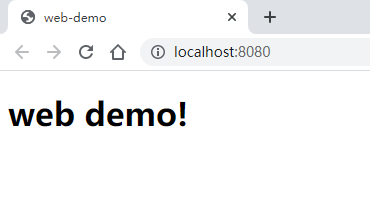 <br><br> 比较遗憾的是目测没找到合适的HTML/CSS高亮和自动补全插件 另外JSP的高亮和补全也约等于没有 社区版估计也很难有人专门开发JSP的插件,有版权问题外加用的人极少 暂时先折腾到这里,如果后续有其他进展再在这篇笔记下继续更新 其实假如有一天实在不能用IDEA开发JSP的话,还有2个出路,可以选择VS Code或者Eclipse。 ## END 送人玫瑰,手留余香 赞赏 Wechat Pay Alipay Vue项目实现PWA 把网站安装在浏览器和桌面 Windows 11 安装 Docker Toolbox 基于 VirtualBox