Arch Linux 初体验 安装在虚拟机 VirtualBox 从零开始学 home 编辑时间 2021/12/08  <br><br> ## 前言 早就听闻Arch Linux各种好用,天下无敌,但门槛也是极高的,于是打算先搞个虚拟机体验一下。 虚拟机选 Oracle VirtualBox 主要看上他免费,性能也不错,贴个官网地址,需要自行下载安装 <br> 参考资料 [https://linux.cn/article-8305-1.html](https://linux.cn/article-8305-1.html) [https://wiki.archlinux.org/title/Installation_guide_(简体中文)](https://wiki.archlinux.org/title/Installation_guide_(简体中文)) <br> 开始之前需要先安装完成 Oracle VirtualBox [https://www.virtualbox.org](https://www.virtualbox.org) 以及下载iso镜 [https://archlinux.org/download/](https://archlinux.org/download/)  <br><br> ## 折腾 <br> 打开 Oracle VirtualBox ,点击 新建 , 类型选择Linux ,版本选择 Arch Linux x64 , 名称随便写 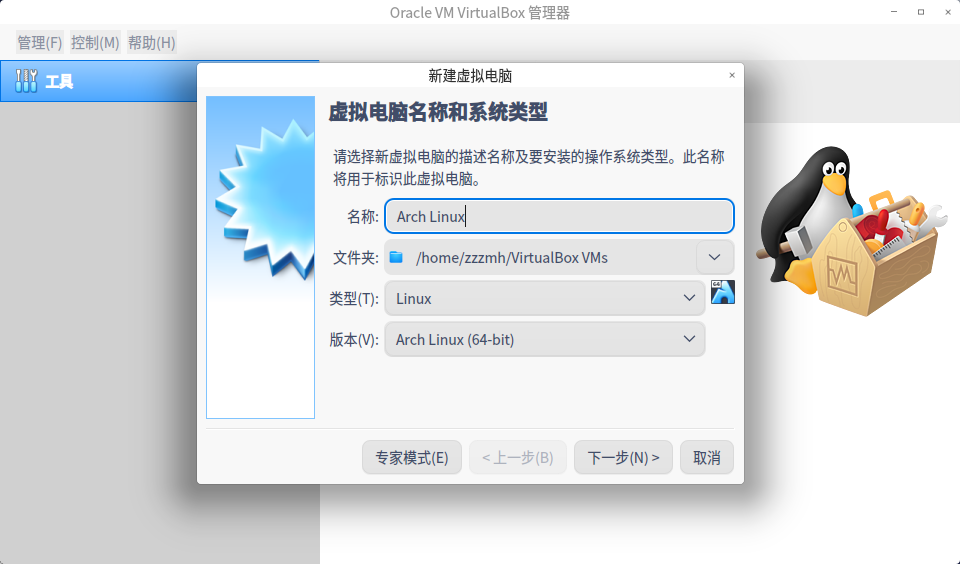 <br> 内存选择2048M ,你也可以根据电脑配置选择更高,如后期需要玩图形界面,可以给4096M 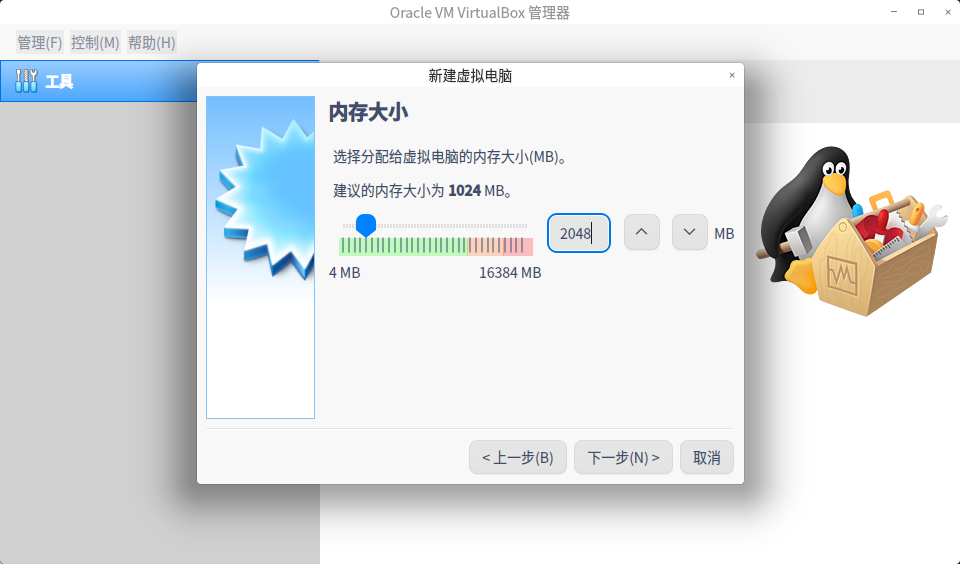 <br> 磁盘新建一个,推荐给到25G 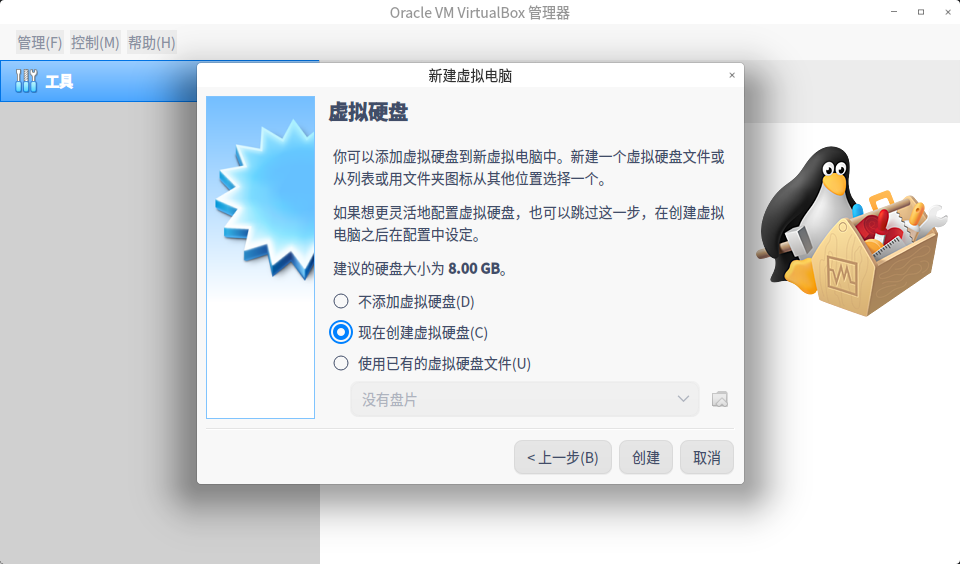 <br> 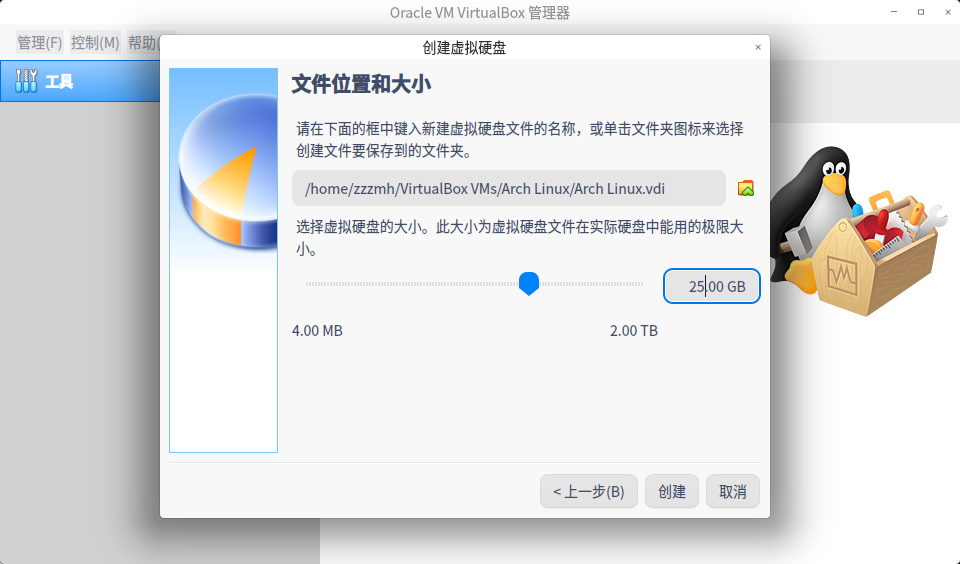 <br> 启动容器,就会弹出框,选择镜像,按照图片里操作即可。 镜像开头说了,如果还没下载的话,点击下载地址 https://archlinux.org/download/ 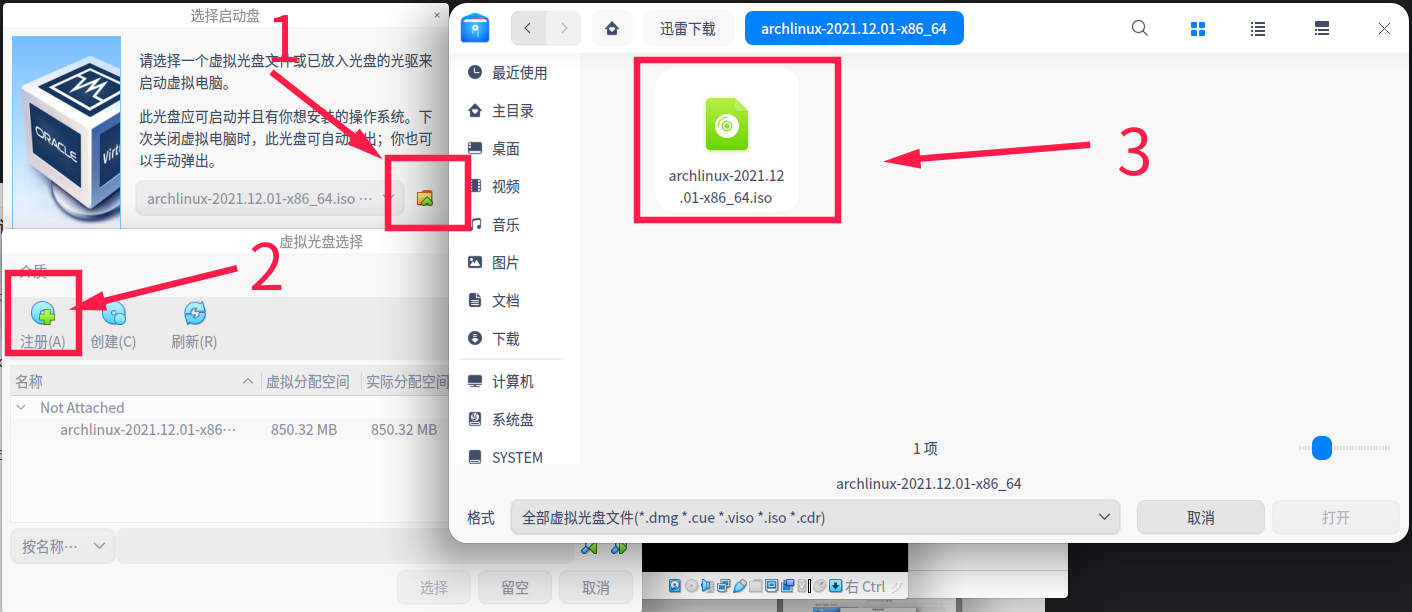 <br> **注意,从这里开始后面的都不能复制粘贴,里面也不支持鼠标,只能切换到里面以后,用键盘操作,命令要自己手打,注意空格** <br> 回车选择第一个即可 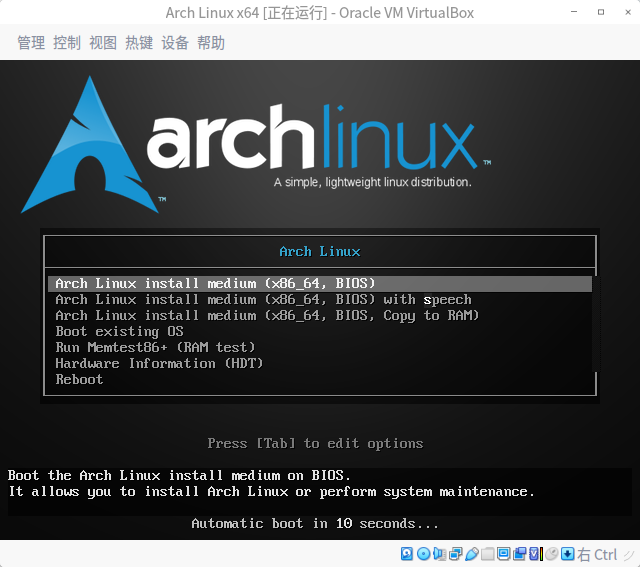 <br> 到这里开始打命令 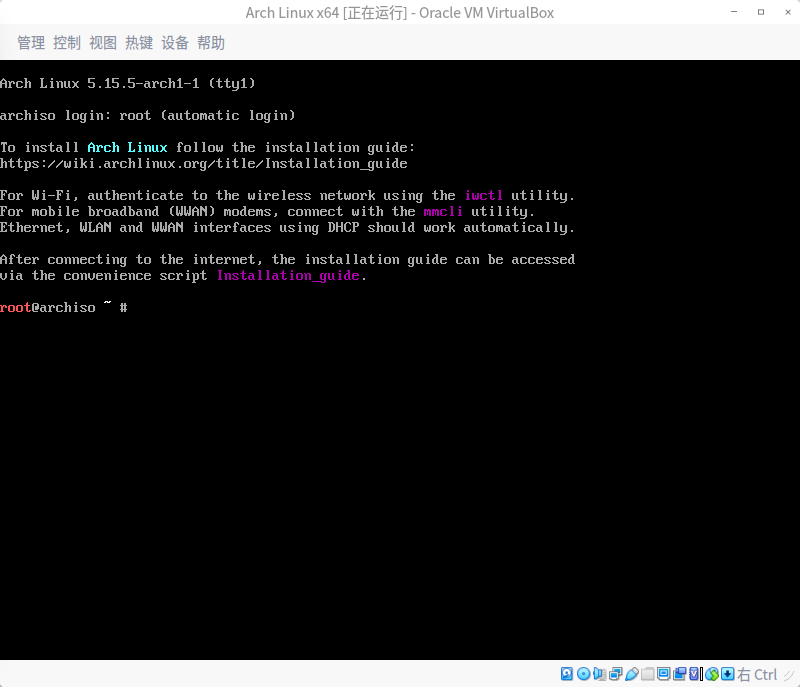 <br> 使用命令 ```shell fdisk -l ``` 查看磁盘情况,我这里可以看到一个新的磁盘25G  <br> 使用命令 ```shell cfdisk ``` 分区 第一个选项选择 `dos` 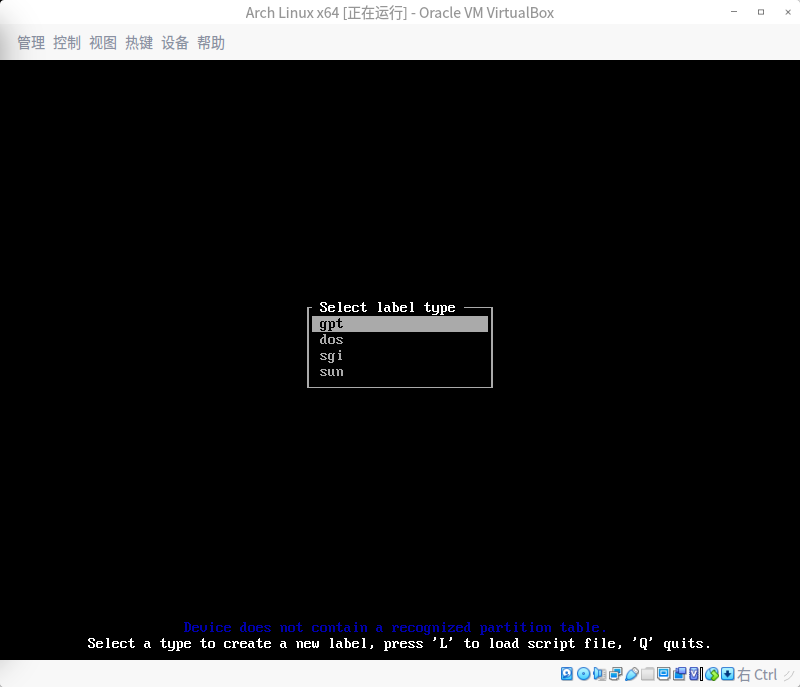 <br> 这里先 依次选择 [NEW] 25G [primary] [BOOTABLE] [WRITE] , 输入 yes  <br>  最后选 [Quit] 退出 <br> 再次查看 ```shell fdisk -l ``` 多了一个新的设备,我这里的路径是/dev/sda1  <br> 格式化 ```shell mkfs.ext4 /dev/sda1 ```  <br> 挂载 ```shell mount /dev/sda1 /mnt ``` 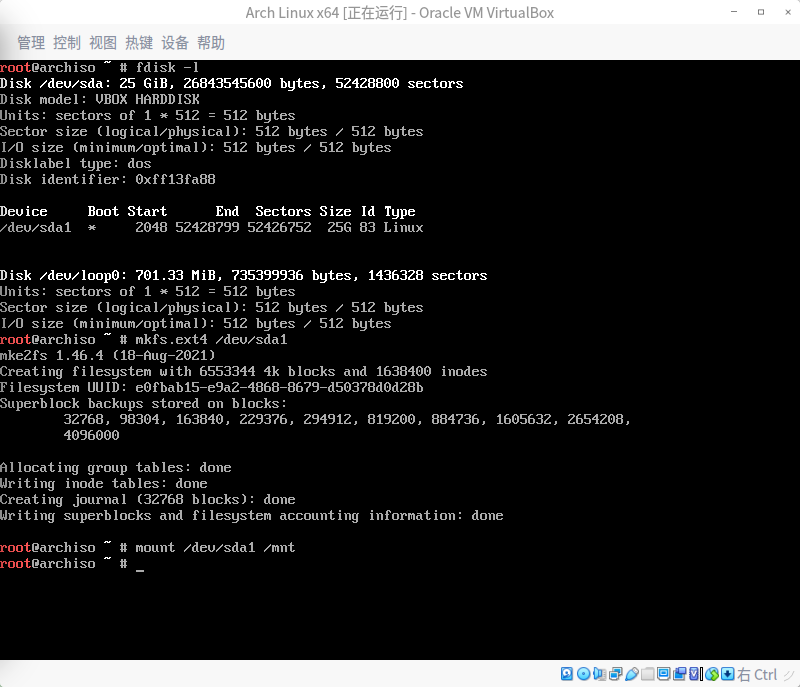 <br> 安装基本软件包 ```shell pacstrap /mnt base linux linux-firmware ``` 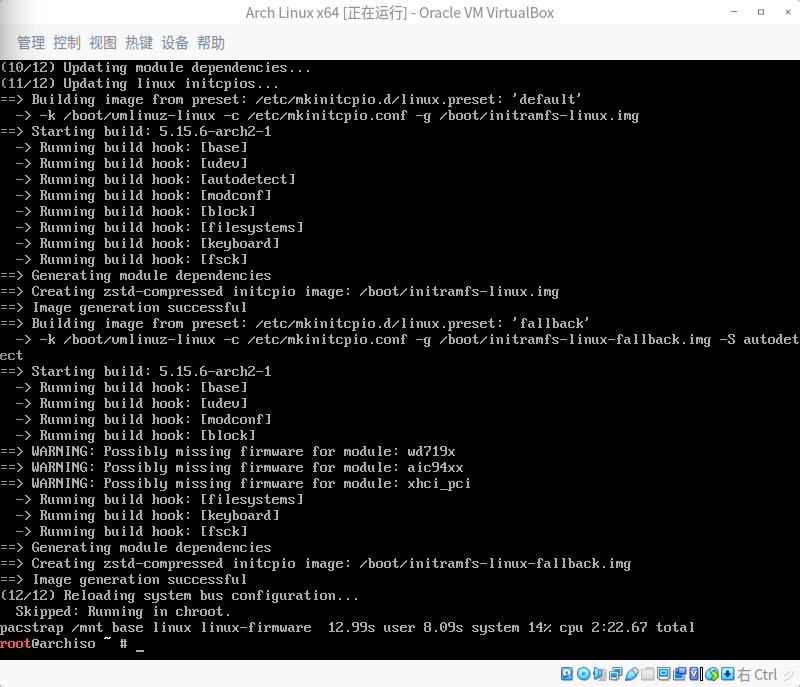 <br> 用以下命令生成 fstab 文件 (用 -U 或 -L 选项设置UUID 或卷标) ```shell genfstab -U /mnt >> /mnt/etc/fstab ``` <br> Change root 到新安装的系统: `arch-chroot /mnt` 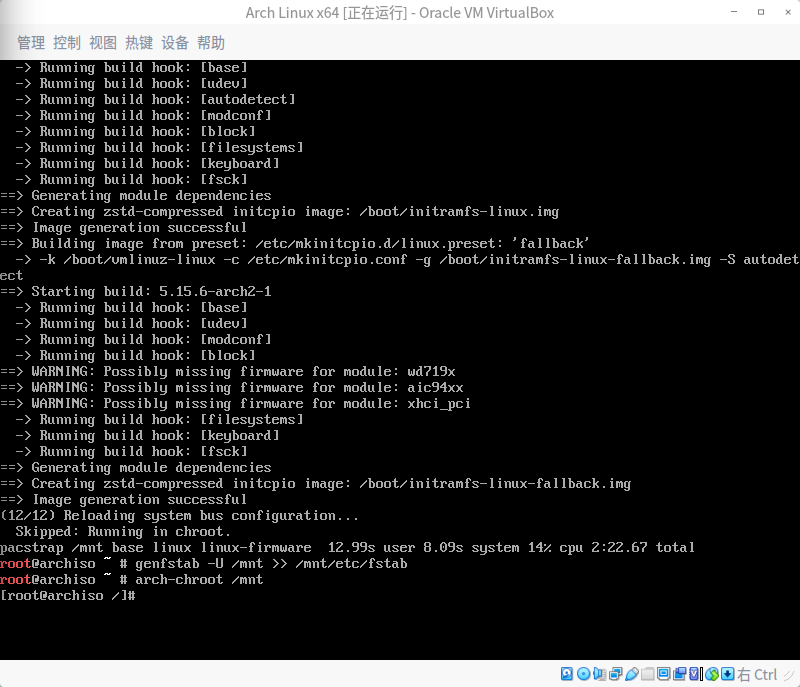 <br> 时区设为上海 ```shell ln -sf /usr/share/zoneinfo/Asia/Shanghai /etc/localtime ``` 然后运行 hwclock(8) 以生成 /etc/adjtime: ```shell hwclock --systohc ``` 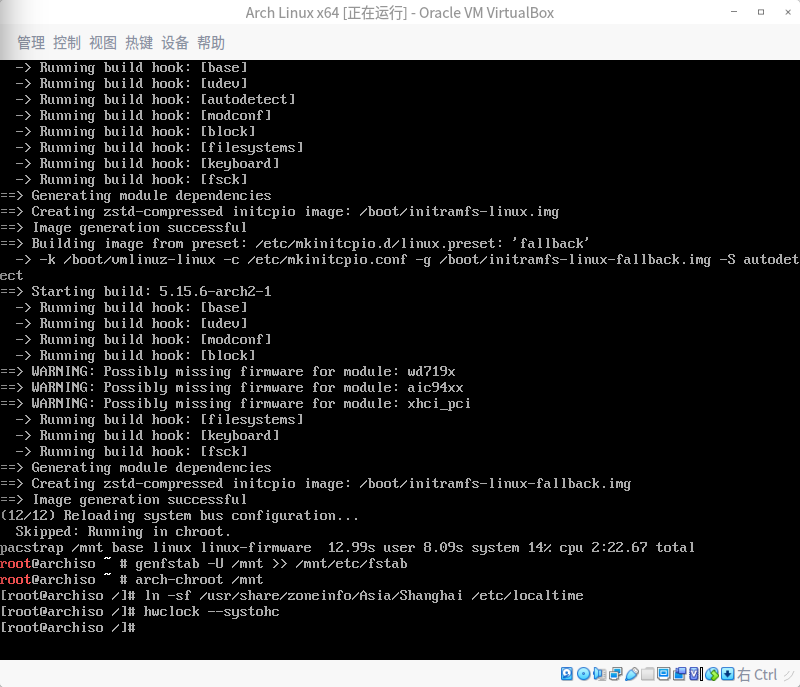 <br> 下一步是最迷惑的 要修改 `/etc/locale.gen` 文件 然后取消掉 en_US.UTF-8 UTF-8 和其他需要的 地区 前的注释(#) (这里也有用en_GB.UTF-8的选择,好坏自己看官方wiki,地前留了) **BUT!!!** **不让用 `vi` `vim` `nano` !!!** **那我咋修改呢?**  <br> 这里我查遍了百度也找不到方法,于是我只能继续用笨办法了 先用 `more` 看看里是不是全都是注释掉的 ```shell more /etc/locale.gen ``` 发现全部是 `#` 开头,说明没有打开的,那只要追加一行我需要的即可,要防止意外的话也可以复制一分backup,我就不麻烦了,直接追加 然后我这里还是用en_US作为系统默认语言,方便日志、系统文件都是英文,既可以百度谷歌出教程,也可以在命令行全英文操作,防止出现 `/home/user/下载/acd.pdf` 这种路径 ```shell echo "en_US.UTF-8 UTF-8" >> /etc/locale.gen ``` <br> 再用cat看下末尾一行是不是追加的内容即可搞定 ```shell cat /etc/locale.gen ``` 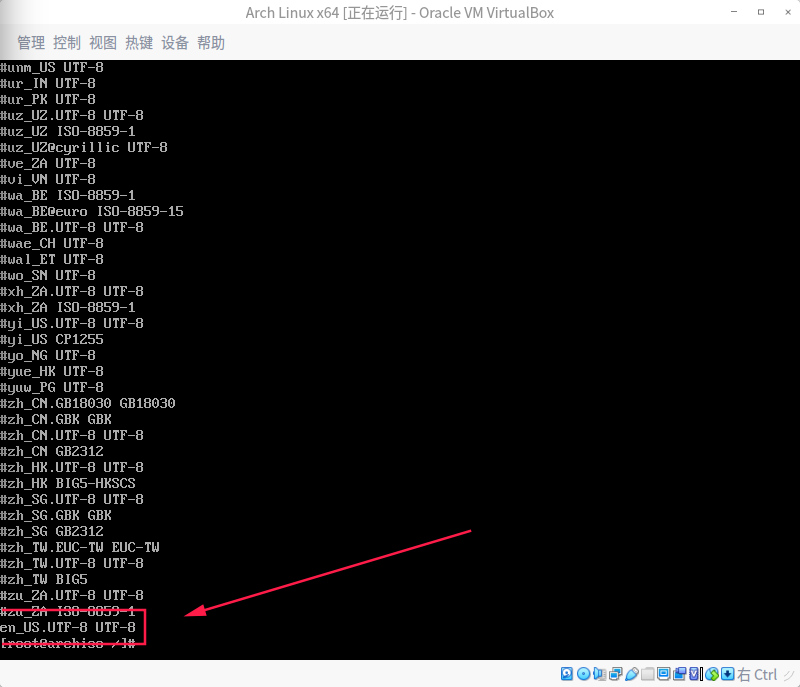 <br> 接着执行 locale-gen 以生成 locale 信息: ```shell locale-gen ``` 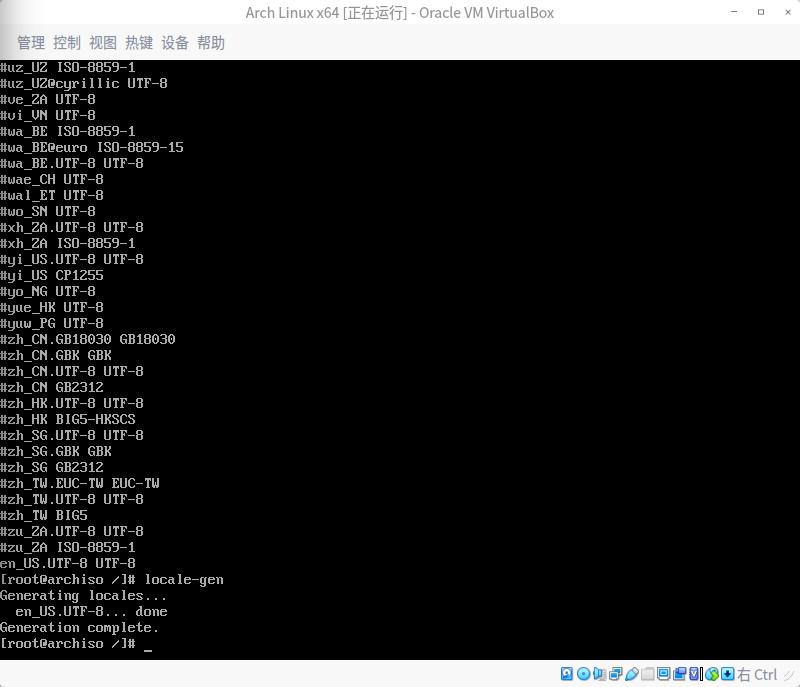 <br> 然后创建 locale.conf(5) 文件,并 编辑设定 LANG 变量,比如: ```shell /etc/locale.conf LANG=en_US.UTF-8 ``` **OMG!! 又来了** **不让用 `vi` `vim` `nano` !!!** **那我咋创建呢?**  <br> 继续试试 `echo` 能不能好使吧 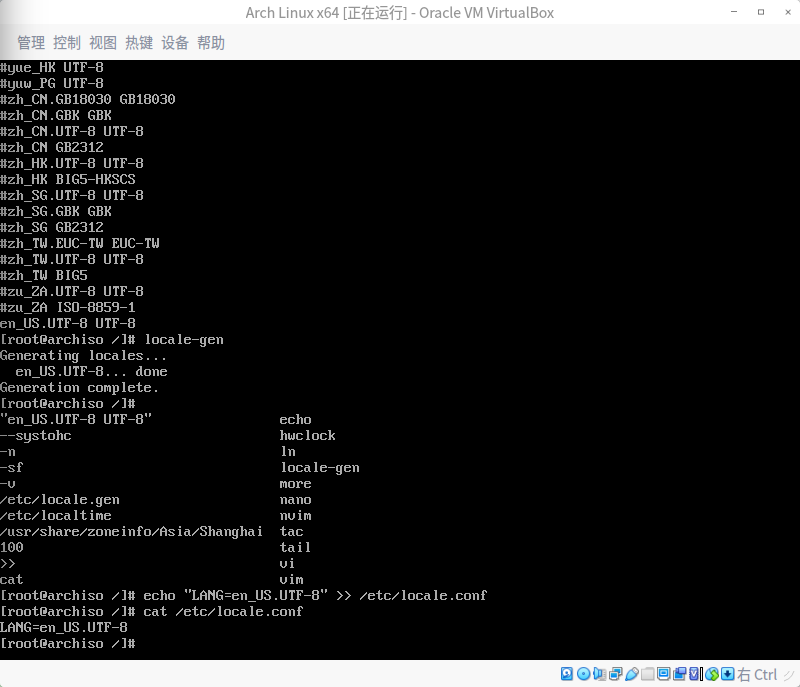 <br> 果然好使 `echo` yyds <br> 后面键盘布局啥的就不想折腾了 累了 直接搞定重要的就毁灭吧 <br> 设置root密码 ```shell # 需要注意的是,你是看不见你自己输入的密码的,你输入的时候就理解这句话了,别以为卡了就行,是在输,就是不显示的 passwd ``` <br> 设置主机名: ```shell echo "zzzmh" >> /etc/hostname ``` <br> 设置引导程序 ```shell # 安装 pacman –S grub pacman –S os-prober # 配置 grub-install /dev/sda grub-mkconfig -o /boot/grub/grub.cfg ``` 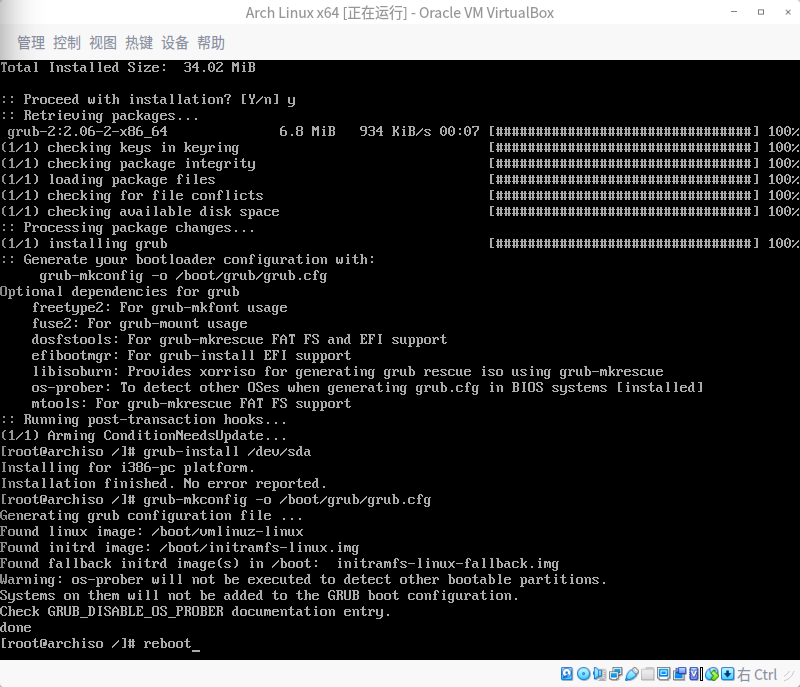 <br> 大功告成 重启下看看 ```shell # 先退到外面 exit # 再重启 reboot ``` <br> 出现这个界面是因为优先走了ISO启动,这里说可以选择硬盘启动的,我的建议是先关闭,后移除ISO镜像,再启动 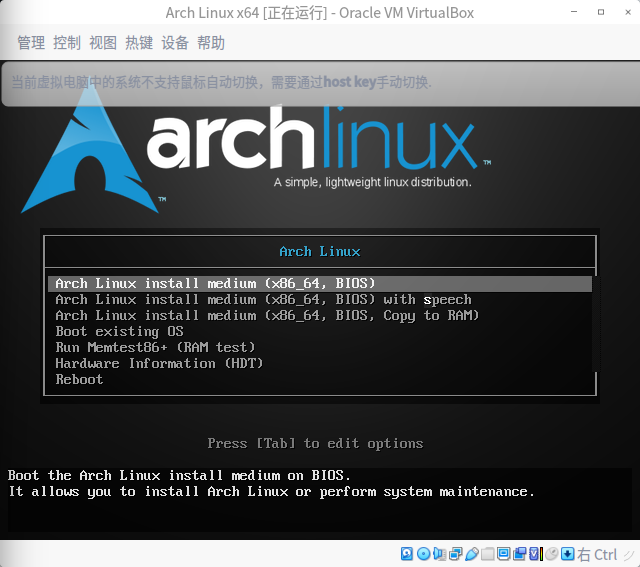 <br> 右击这个小光盘,移除镜像 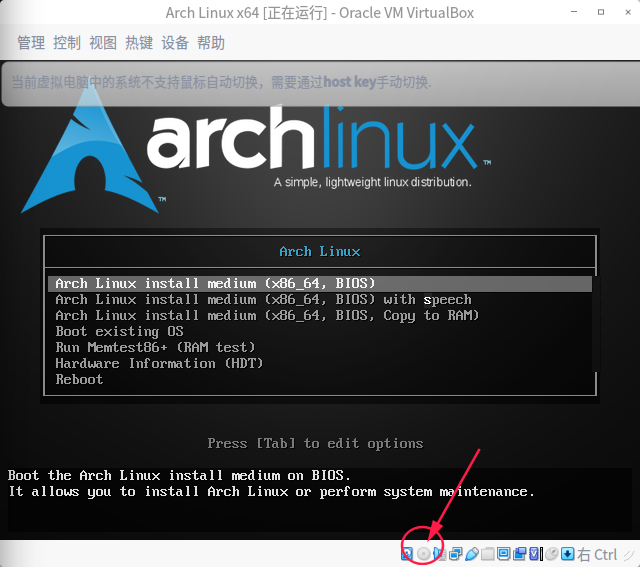 <br> 我这里尝试直接Reboot 遇到问题 所以还是先操作虚拟机强制关闭 不能截图,简单说下凑活看 虚拟机窗口最上面,管理,退出,强制退出,OK <br> 下图这里,右击,启动,正常启动 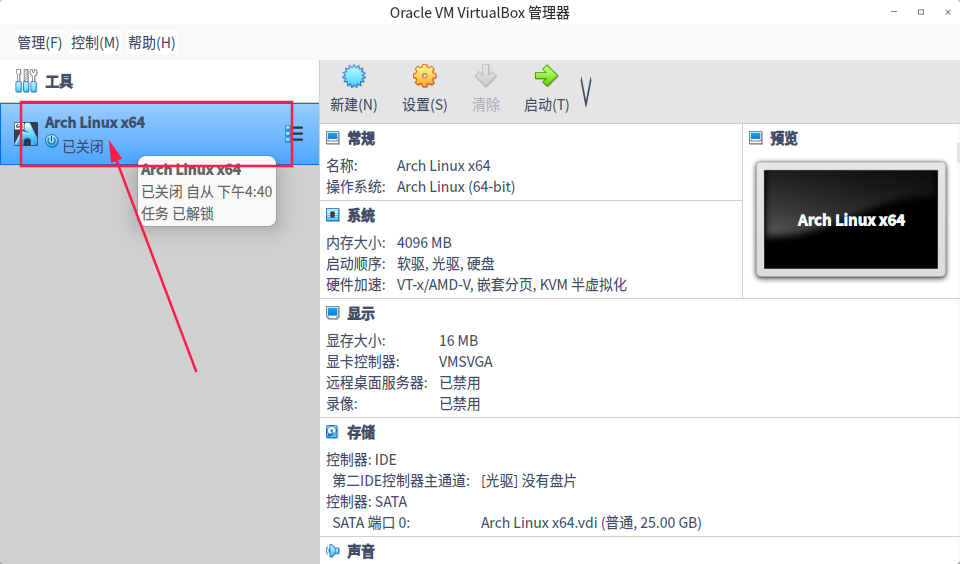 <br> 再启动 一切正常!!! <br> 选择第一个 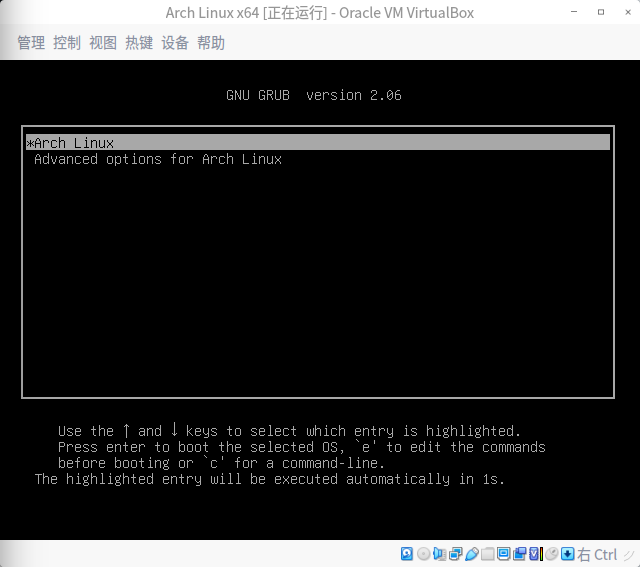 输入账号密码即可进入系统 (账号root 密码是刚才设置的) 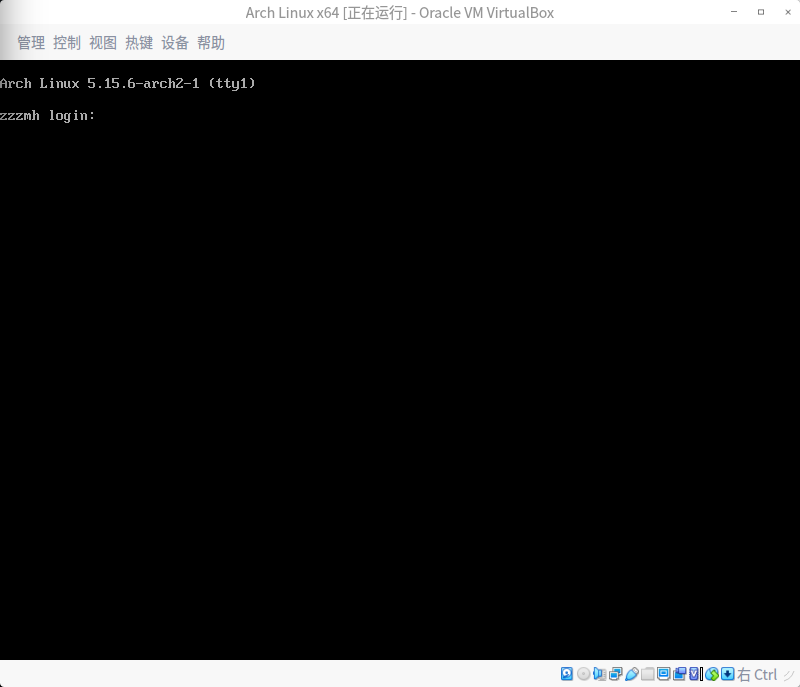 <br> 就到这我折腾了一天你敢信 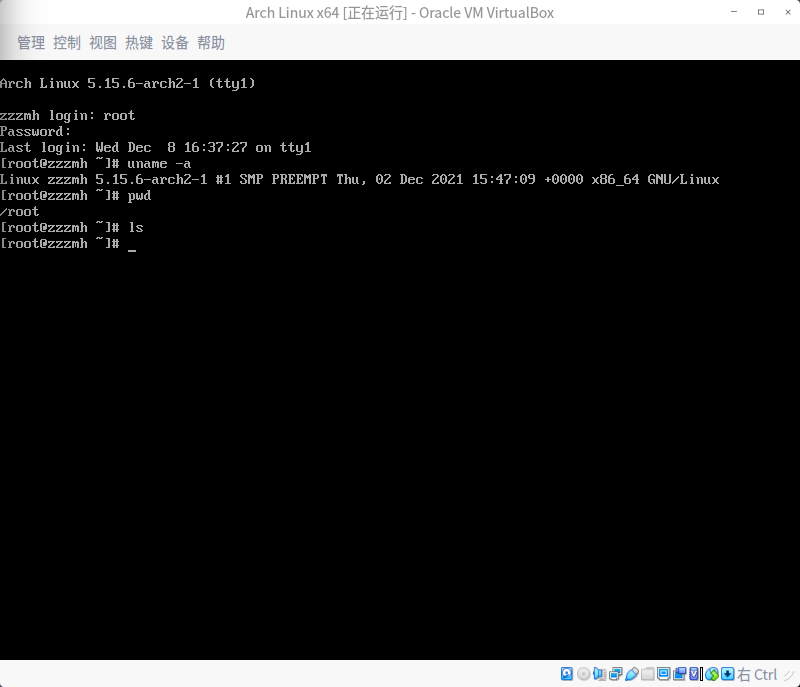 <br><br> ## 补充和纠错 <br> 补充修正几个错误 1. 昨天没有安装dhcpcd 导致无法联网,不能联网就不能安装dhcpcd 2. 其实应该安装vim之类的编辑程序 <br> 补救方法 先把去掉的光盘镜像加回来,重启 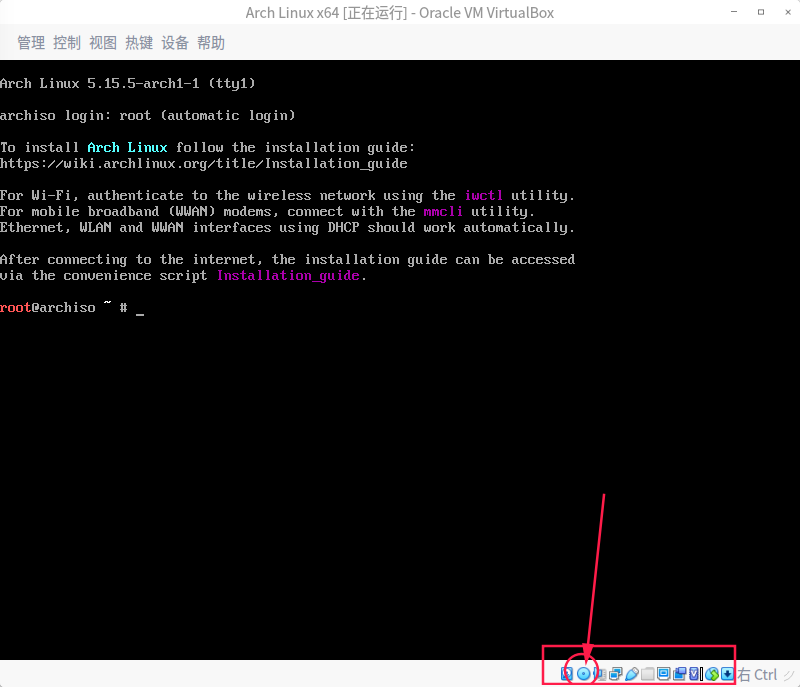 <br> 然后用命令进live系统 (这个是抢救系统神器,以后需要常备) ```shell # 用live系统挂载到内部系统 mount /dev/sda1 /mnt arch-chroot /mnt # ping一下测试现在网络通不 (ctrl + c 停止) ping www.baidu.com # 安装关键程序 (dhcpcd是自动联网获取ip地址,没装的话开机无法联网,不能联网就不能安装任何东西) pacman -S dhcpcd pacman -S vim # 顺手补充一下,连wifi需要安装这个 # pacman -S iwd # 用法参考这里 https://blog.csdn.net/r8l8q8/article/details/76516523 # 设置开机启动 systemctl enable dhcpcd ``` 随后先关闭容器,再移除光盘镜像即可解决问题 <br> 还需要简单优化一下,避免无缘无故掉一些不起眼小坑 ```shell sudo pacman -S pacman-mirrorlist sudo pacman -Syy ``` <br><br> ## 往死里折腾 !!! <br> 肯定不能完事!必须把图形化也搞出来,找个既极简又傻瓜的图形化玩玩 <br>  <br> [https://blog.csdn.net/weixin_31569671/article/details/116709653](https://blog.csdn.net/weixin_31569671/article/details/116709653) 先新建一个用户 (我的用户名设置是zzzmh,你可以替换成你自己的) ```shell # 新建用户 useradd zzzmh # 设置密码 passwd zzzmh # 新建文件夹 cd /home mkdir zzzmh chmod -R 777 zzzmh # 安装sudo(我才知道原来sudo也是需要安装的) pacman -S sudo # 安装完会出现权限配置文件 vim /etc/sudoers # 找 root ALL=(ALL) ALL 加一行 配置结果看图 zzzmh ALL=(ALL) ALL ``` 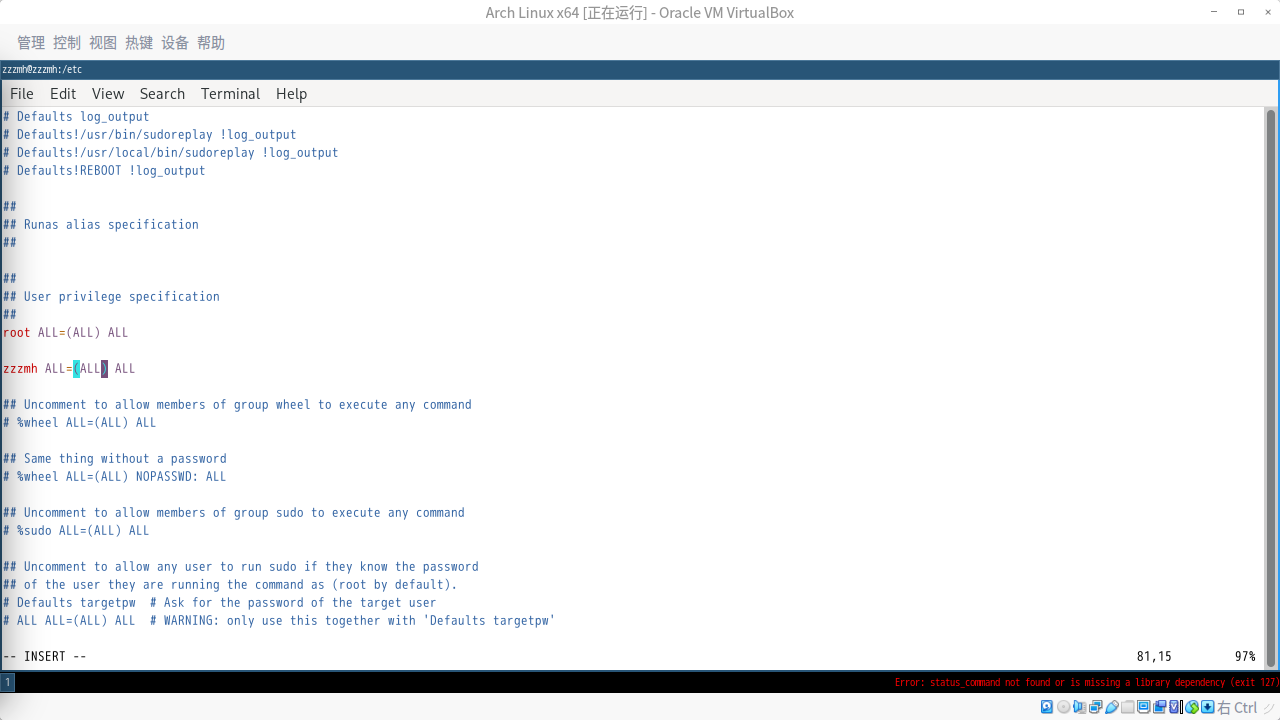 <br> 把桌面安装上,这里直接参考教程 [https://blog.csdn.net/r8l8q8/article/details/103889972](https://blog.csdn.net/r8l8q8/article/details/103889972) ```shell # 虚拟机里就不需要显卡驱动了,直接开始安装 # 安装X窗口系统 pacman -S xorg-server # 安装sddm登录管理器 pacman -S sddm systemctl enable sddm # 安装i3wm pacman -S i3-gaps # 安装终端 pacman -S mate-terminal # 重启生效 # 注意:重启之前必须先新建一个用户,因为不能选择root,导致没有用户没法选择一个用户进桌面 reboot ``` 最后再启动虚拟机即可进入桌面,选择一个用户,输入密码回车 <br> 这里会提示选择MOD键是super键(也就是windows键)还是alt键 <br> 这里遇到了首次进入桌面报错 `status command not found or is missing a library dependecy` 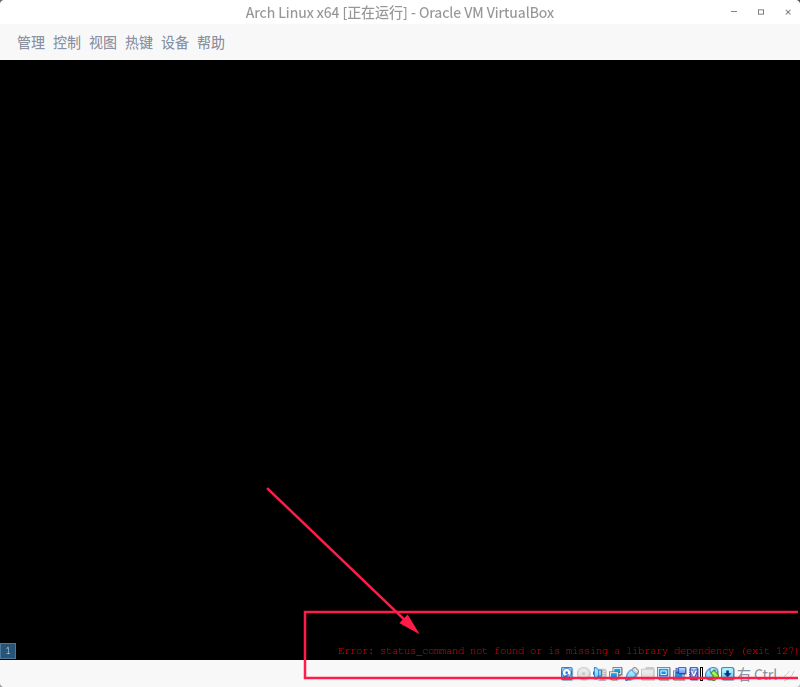 <br> 可以先不用管,先从i3入门开始学习吧 参考文档 [https://i3wm.org/docs/userguide.html](https://i3wm.org/docs/userguide.html) <br> 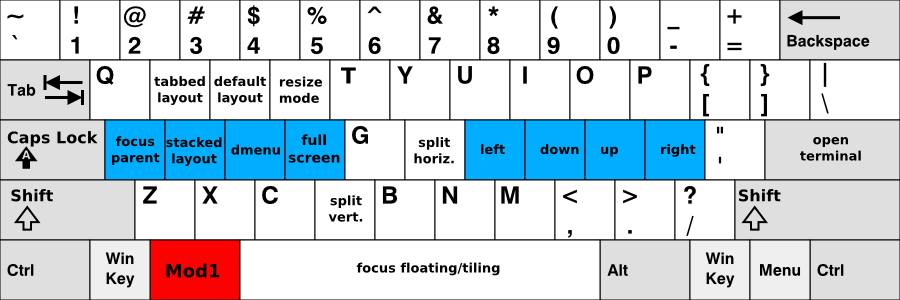 <br> 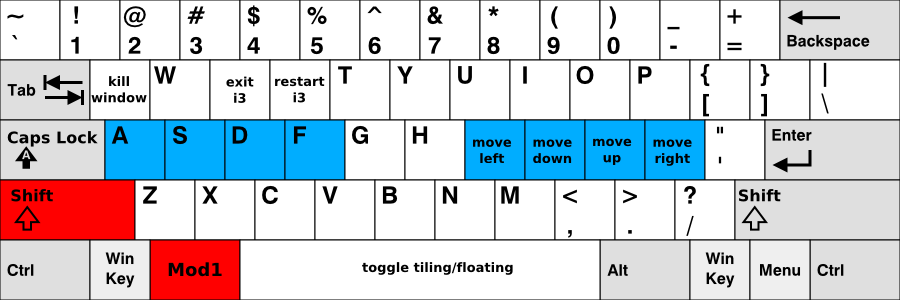 <br> 我简单试了试 * mod + enter 进终端 * mod + d 执行程序 <br> (这部分仅在虚拟机中才需要) 安装Oracle VirtualBox增强工具 可以实现内外共享剪切板,根据窗口动态分辨率等 ```shell # 开启root su # 安装 pacman -S virtualbox-guest-utils # 手动开启增强 VBoxClient-all # 手动开启各种服务 modprobe -a vboxguest vboxsf vboxvideo # 开机启动 systemctl enable vboxservice # 重启再试 reboot ``` <br> 安装第三方程序 [https://www.cnblogs.com/tonyc/p/7739830.html](https://www.cnblogs.com/tonyc/p/7739830.html) ```shell vim /etc/pacman.conf # 末尾添加 [archlinuxcn] Server = https://mirrors.ustc.edu.cn/archlinuxcn/$arch # 安装archlinuxcn-keyring导入GPG key。 pacman -Sy archlinuxcn-keyring # 同步软件包并安装yaourt pacman -Sy yaourt # 至此就可以安装第三方APP了 # 比如chrome浏览器 yaourt google-chrome # 这里出现多个结果(如下图) 我这里选择4 最符合我的需要 4 # 之后会问是否修改 PKGBUILD 选否 n n ``` 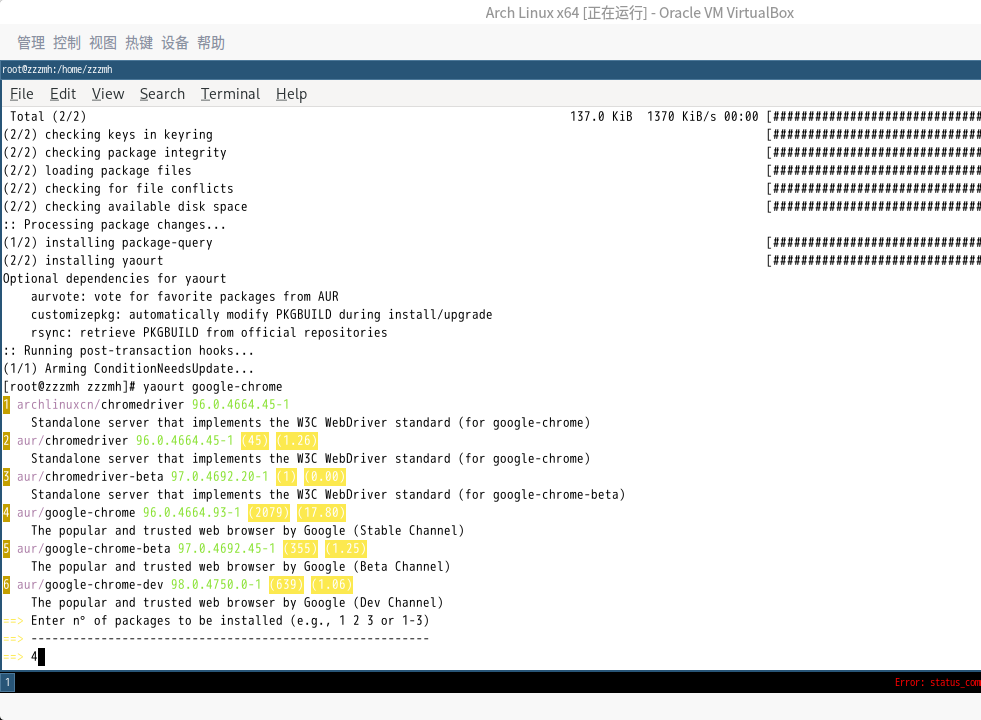 ## DAY 3 补 继续补充,这里需要给pacman和yaourt都切换到最快的源上,否则可能动不动就404 https://www.cnblogs.com/fb010001/p/12698142.html ```shell sudo pacman -Syy yaourt -Syua ``` <br><br> ## END 参考资补充 [https://blog.csdn.net/weixin_36250058/article/details/112713233](https://blog.csdn.net/weixin_36250058/article/details/112713233) [https://blog.csdn.net/r8l8q8/article/details/103889972](https://blog.csdn.net/r8l8q8/article/details/103889972) [https://blog.csdn.net/weixin_31569671/article/details/116709653](https://blog.csdn.net/weixin_31569671/article/details/116709653) [https://blog.csdn.net/r8l8q8/article/details/76516523](https://blog.csdn.net/r8l8q8/article/details/76516523) [https://www.cnblogs.com/fb010001/p/12698142.html](https://www.cnblogs.com/fb010001/p/12698142.html) 送人玫瑰,手留余香 赞赏 Wechat Pay Alipay Arch Linux 从零安装 i3-wm 二周目 纯享版 Windows 中运行 Linux 探索 WSL2 非双系统 保姆级教程